Monday, January 4, 2010

Production-Lining Your Art


Most of us build more than we can finish in the short term, we all have a variety of projects on the boil at once and many of us move among them at whim, building or painting as the fancy takes us. That’s the marvellous flexibility of the hobby, really. Of course some end up back in their boxes on the shelf because we’ve lost patience with them for some reason – obstinate fit, inaccuracy, waiting for parts or decals, whatever. The only kit I’ve put aside in recent times was a Hobbycraft Corsair, and it’s rather put me off the brand.

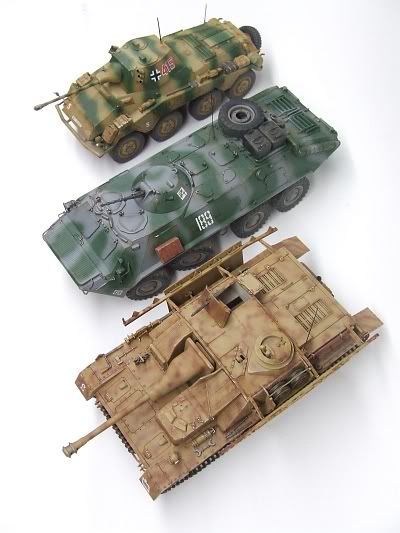
But eventually you need to clear that bench, get projects to completion, on display, and move on to new territory, though sometimes models have been in play for years. I found myself doing this recently, with a Zvezda (ex-Dragon) BTR-70 that had been unfinished in the box for about three years after being started as a ‘need-to-build-something’ project that I had thought would be a quick build, only to find the tiny Dragon parts tended to snap on the sprue, and the need to replace some with shaped wire rather consigned the beast to the shelf for a long time. Recently I got around to building a Tamiya StuG IV which has been in my stash for at least ten years, I got it from a second hand dealer in Japan, it’s the edition with all Japanese instructions (not that that’s a problem, Tamiyas really only go together one way and the diagrams are obvious.) Add to the mix the Testor edition of Italeri’s Sd.Kfz 234/2 Puma recon vehicle and I had a trio of 1:35th scale armour all clamouring to be finished more or less together. (You might have spotted them in the previous post, if sharp-eyed.)


So the solution was to do them production-line fashion. Henry Ford knew what he was doing, and while it depersonalised a craftsman into a repetitive technician, the hobby can withstand that at a small scale. Given that all three models were finally into their full paint jobs, I could tackle the finishing phases all of a piece. Each model received its fade coat, highly thinned paint misted onto the horizontal surfaces to create the impression the paintwork is faded by the elements. Then I did the oil filter weathering on them all, which was a process of washing the acrylic paints over with enamel thinner carrying dissolved artists’ oils to create tonal variety and the characteristic patterns of rust streaking. Then the pinwash to bring out details by capillary action, and tiny amounts of thicker paint to establish areas of open old rust; and finally brighter rust shades where rust is newer. The next phase is drybrushing in enamels (I can’t do it in acrylics, they simply dry too fast for me to keep up with the job and the task of endlessly cleaning and refreshing the brush) to profile edges and raised detail, making them ‘pop’ from the darker background of the paint and washing.

Then onto external fittings: tools and jerrycans on both the German subjects, all of which need to be painted and weathered before mounting, and a couple of fittings for the BTR. Next step decals – all three models could cross the bench together. Then onto the dust phase, Mig pigments brushed on in strategic locations for that touch of environment adhering to the beast. Final fittings, delicate radio antennas are often the last thing I mount, and of course the tedious process of painting a sharp division between wheel rims and tires, though that was eased somewhat with a new tool I’ll be reviewing here before long.


So there you have it – the same finishing techniques applied across the spectrum of three models in widely varying schemes, two wheeled vehicles, one on treads, different eras, three different manufacturers, but all responding to the same techniques for a satisfyingly dirty, beat-up appearance that whispers to the viewer’s subconscious that these vehicles have seen plenty of hard service. And all walked through the process from overall painting to completion side by side over the space of about a fortnight.

Now, I wonder if I should production-line build from the beginning in future? It certainly speeds up a heavy build schedule…

Look for retrospective reviews of these kits right here in the near future!

Saturday, January 2, 2010

I Know Where Everything Is… Really!


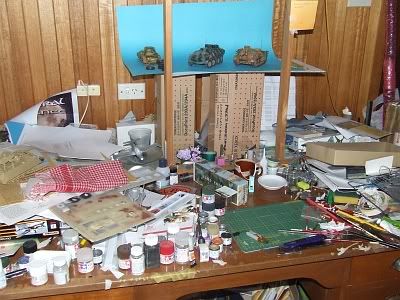
Quick! How many unfinished models can you spot in the picture above? No, it’s not easy, is it?

Finishing a couple of projects calls for clearing the bench to set up proper lighting and get the gallery photos, and it’s only then that you realise what a pigstye you’ve been working among. I mean, some people have clean, neat, tidy work benches – but so far I’ve not been one of them, and in fairness to myself I can’t say my hobby has really suffered. It’s odd the way the brain maps your bench, you seem to know which quadrant you put any particular tool down in last, and whereabouts in what chronological order down which stack you’ll probably find things sandwiched together.

Then comes the phase where you clean the bench, tidy everything up and then you’ve had it because you can’t find a thing!

Acrylic paints in that box, enamels in that box, tools back in the tool drawer, scratchbuilding supplies back in their drawer, sort bits from three open kits back into the boxes they belong in… Take stock of which project(s) to finish next.

Do you ever loose things completely? Other than into the jaws of the carpet monster? I don’t think I ever have, unless you count the pairs of scissors that keep vanishing, but that’s natural enough. Scissors always vanish, always have and always will. When it comes to kit bits, it’s a rare one that’s flown the coup, and sometimes due to plain bad luck – thinking that tiny part that fell off and was put carefully aside is actually a mote of dust and blowing it casually who-knows-where a split second before remembering it was a part to be reattached. That’s dumb, but probably not the dumbest thing one can do on a modeller’s bench…

With New Year’s Day it’s fitting to clean the bench. When I have a proper workshop I’ll be able to keep it neater (I say, smiling hopefully), but for now, I’ll make the best of the considerable space and resources I’ve managed to assemble, and allow myself an uncluttered workspace slightly larger than the A4-size cutting mat that forms my centrepiece at this time.

So Happy New Year, and let’s hope for some bench time as the world swings back into the working week as of Monday!

Tuesday, December 29, 2009

I Feel Like Building A Model… NOT Painting It!


 Have you ever had the feeling that one part of your artistic creativity is in conflict with another? There have been occasions when I had a spare hour or two and found myself staring at the projects underway and realising that every single one was at some point which obliged me to set up my airbrush and start pushing various colours through to spot-paint detail parts, which means far more cleaning of the airbrush and its jars, and far more mixing of paint, than actual painting. There are times when you just want to build. One problem with aircraft, much as I love them, is that you’re pretty much obliged to paint that wretched cockpit first. Struggle with tiny details, drybrush the controls, put on decals perhaps, create instrument lenses with blobs of Clear Parts Cement, and suchlike. And frankly, there are times you don’t want to be bothered with all that, but just get to the engineering of the piece, tidying up the parts and bringing them together just so, then perhaps doctoring the joint lines with whatever technique you prefer. Perhaps that’s one of the drawcards of armour modelling. Unless you have a perverse desire to open hatches all the time, the inside of a tank is a mystery to the viewer and can be conveniently ignored, which means most of a tank can be built before you need to start painting, and that’s attractive. Building the barrel and turret, mounting suspension swing arms and other lower hull details, dressing the upper hull with hatches, grills, any number of parts that can go on before you need to paint anything… Then join the hull, do some joint work if needed, and you’re into masking the locators for tools and such, masking the mating ring of the turret and all the axles. Oh yes, there’s lots to do before you need put down the first colour. The Academy M981 above falls into this category: I just wanted to enjoy building, and a relatively complex, multi-part armoured vehicle fit the bill to a T. I put it together months ago, and when a slot comes up in my painting schedule it'll finally see it's three-colour camouflage.  


 Right now I have 20 models in progress, at some stage or other. I could be mottling the camo of that Tamiya Me 262, or I could be prepping for the natural metal finish of that F-84 Thunderjet. But over the last week or so I’ve been wash-and-drybrush detailing three armour kits. The time comes when you have to paint what you’ve built and production line modelling is a way of getting through them. Base colour, camo pattern, fade coat, oil filter weathering, pinwash, drybrush profiling, decals, dust coat… I’ll get back to aircraft shortly, I have at least seven to finish in the next two months or so, but you know, when the fiddly details have got me at my wits’ end, I’ll take a break from being an artist, and be an engineer again for a few relaxing sessions. One thing I’m certain of: whatever I build on that day, the odds are it’ll have tracks under it! Hoping you all had a wonderful festive season and that the New Year brings everything you could hope for! Cheers, Mike/Thunderbolt379

Sunday, December 20, 2009

What’s in a Stash...?


 The Immortal Bard certainly did not have plastic modelling in mind when he coined the line so freely paraphrased for the title above, but it makes for an interesting question. The modeller’s stash... The “styrene ceiling” that has been collecting dust in the attic since you moved into that house not long after you were married (out of sight, out of mind, at least for one’s other half if said half is less than tolerant of the hobby), or the pile of boxes jammed onto the top shelf in the hall closet, or the packing case in the basement. Or the tea chests in the shed. A shed can be a good thing, for more than powertools and a place for sawing timber. A modeller’s kit stash however represents changing interests and availability over time -- I mean, how long has that collection been amassing for? We buy kits at a far faster rate than we can build them, and many of us pride ourselves on the stature of our collection. The oldest kits in my stash (meaning the date of my acquiring them, not their date of manufacture or reissue) probably date from the late 80s/early 90s, I had quite a few older Hasegawas from the 1980s that I traded off to a dealer about that time, along with an unfinished Revell Cutty Sark dating from about 1975. But even the oldest parts of my stash have probably spent no more than 20 years in my care. So in 20 years, where have trends in the market and variations of interest taken me? A burgeoning interest in armour, the odd ship here and there, a major emphasis on larger scales, dinosaurs when they were in vogue, even a few space and SF subjects. (A few? I’ll build all those AMT Star Trek kits eventually...) What about the role of eBay? I recently passed the 5th anniversary of my first tremulous venture into online bargain-hunting, and in those five years my stash has grown faster than ever before, with kits I never imagined I would snag for reasons of cost alone. But good quality kits at genuine savings are a daily event on eBay, and gradually many gaps in my collection were filled in. All of what you see here are eBay transactions.  


 I imagine most modellers go through a ‘flesh-out-the-stash’ phase, when the allure of bargains allays the fear of unwarranted luxury expense coming back to bite one when there are bills to be met. But, sometime down the track, there are indeed those whose tastes and interests change so drastically over the years that they realise the investment their stash represents by offering them for sale, either piecemeal through eBay as a seller, or by moving the whole lot to a trader. Trading in collections was a brisk business before the current economic downturn, and resulted in more great bargains for buyers further down the line, as individual kits moved from Stash A to Stash B and profit accrued for the facilitator. Hopefully things will recover and this system will become profitable again. That’s business, and everybody comes out of it happy. I would certainly never have afforded a great many kits in my stash any other way. One day I’ll have a dedicated modelling room, like you see in the pages of FSM, with a properly-lit workbench, bookcases for reference materials, drawers and cabinets for every last tool and accessory supply I could need, paint racks for the hundreds of shades I have in stock, and of course a spraybooth and silent compressor, and a permanent photographic area for recording my work in progress. Display cases for the finished product, of course, go without saying. And I would hope that an entire wall in this room would be shelving for my stash, from floor to ceiling, the whole thing brought together in one place rather than in the cardboard cartons it presently occupies: it would look like a well-stocked hobby shop and the great thing is, it’s all already paid for! Here’s one of two small rooms my packaged stash occupies: have I mentioned lately how much I appreciate the support and interest of my better half? 


I’m not preening here, I know there are modellers out there with much more extensive stashes than mine, in size, in quality, by any reasonable form of measurement, and the stash is what it’s all about. What interests the modeller, how your interests change over time, and how you dip into that stash as the years go by to build that special item at long last -- these questions are the mystique of having the collection. Some folks ask me why I don’t sell the lot at once if they’re worth money, and ‘do something with it.’ I answer them that I am doing something with it: I’m enjoying being a collector!

Monday, December 14, 2009

The Great Phantom Showdown


 I love Phantoms. I’ve always loved them, ever since I was a kid and the F-4 was the real-life big kid on the block. I remember a McDonnell-Douglas add on the back cover of an aviation magazine from the late 1970s that praised the Phantom as “The Warbird of the Free World.” That magazine is still somewhere in my collection, if I ever get a chance to look through the old stash I’ll probably find infinite anecdotes. I also remember reading an article on the development of the F-4, it was probably in an old Aeroplane Monthly or Aviation News, that said the military brass thought the plane they were being offered in 1958 was downright ugly, “a great jagged juggernaut, massive as a WWII bomber, clumsy as a goose with its downswept tails…” That’s a verbatim quote, the words stuck in my memory thirty years ago. I shook my head as a young teen to read that: to me the F-4 was a beautiful aircraft, and I still think so today. Heck, my sister in law was a USAF crew chief and the F-4E was her plane. 


 Modellers tend to agree that the F-4 is, or was, a special plane. 5257 of them, in 13 major variants, not counting recon subtypes, and the markings of at least 15 services, gives enormous scope for variety, and model companies were not slow to recognise this. Early Phantoms were like any early kits, they left a lot to be desired, but by the late 1980s moulding technology was up to the challenge of creating really well-fitting kits, and the firms had recognised that modellers wanted models that not only looked good, they were as close to accurate as possible. At that point the challenge was on. Hasegawa and Fujimi, two of the Shizuoka City giants, went at it head to head in the late 1980s and into the 1990s, a direct challenge for the market dollar on the subjects the model building public most wanted. They each delivered F-14 Tomcats by the bushel, they both fielded squadrons of A-4 Skyhawks, and Fujimi offered up all the major marks of A-7 Corsair as well. But it was in the area of the F-4 Phantom II that perhaps their greatest race occurred.


 By the early 1990s Hasegawa had released all the major variants in 1:72nd scale, and most of them in 1:48th as well, while Fujimi concentrated mostly on 1:72, with a few forays into larger material. Historically, Hasegawa won the battle, their product was more accurate, their packaging slicker, their decals better quality, and the market was willing to wear the fact their product was also correspondingly more expensive. But that’s not to say Fujimi’s product doesn’t have a lot going for it. Consider the most basic comparison: both Hasegawa and Fujimi standardised on recessed panel lines in the late 1980s, and all their quality late-tool Phantoms have fine engraved detail throughout. Hasegawa had better cockpits, and arguably better selections of subject matter, with their multitudinous releases of common parts wrapped in different boxes, decals and painting instructions for every one-off special commemorative scheme that came along, as well as a wide range of standard schemes and squadron markings from around the world. But Hasegawa’s philosophy was to break down the parts in a way that yielded maximum utility between variants, which forced decisions such as separate fin cap parts, and a break in the fuselage just behind the intakes to facilitate different nose sections, the area in which most variety between marks was found. Fujimi tooled the fuselage and tail for each major variation complete and provided a varying tray-like part for the underside of the nose, plus separate scabbed-on parts for scanners, intakes and antennas. This means a Fujimi is a simpler build with fewer seams, and that’s attractive. 


 Hasegawa never got around to retooling the British Phantoms with wider engine bays to accommodate their Rolls-Royce Spey turbofans, but Fujimi did: their F-4K, F-4M, FG.1, FGR.2 and F.3 kits feature generally proper proportions and dimension for the British fleet, and in 1:72nd scale they’re the only game in town if you discount Hasegawa’s old-tool F-4K and M (which featured raised detail throughout), and Matchbox’s old FGR.2, which most serious modellers today will do on account of its way overscale recessed detail. Various options are included in each brand’s product, deployed flaps, positionable surfaces, openable canopies, and different degrees of detail in wheelwells and afterburners, but the averagely-sighted person would have to look twice to decide which kit a model was built from. Given Fujimi’s essentially complete range of variants and their slightly lower shelf price (often much lower today on eBay, though in the early 1990s Fujimi was a notoriously expensive brand, certainly here in Australia), Hasegawa’s top spot is not universally secure and Fujimi have a great many fans for their late-tool product.  


 It is said that Fujimi have not released a genuinely new military aircraft product since their “war on Hasegawa” ran out of steam in the 90s, but there are a great many kits out there in circulation that are fun to build and for which there are oceans of aftermarket accessories, certainly piles of great decals, and unless one is peering into cockpits and wheel wells with a magnifying glass the differences cease to be apparent about 18 inches back, so it stands to reason both brands will continue to compete in the marketplace for the Phantom Phanatic’s modelling buck. Given Hasegawa’s agreement with Revell/Revell-Germany, and the lower price for which Revell can rebox Hasegawa’s toolings (hence the Revell items in the pics above), quality Phantoms are probably easier to get hold of than ever before. I’ll be building 1:72nd scale F-4s from both stables during 2010, and will be retrospectively reviewing and comparing them right here at World in Miniature, so stay tuned.

Wednesday, December 9, 2009

Product Review: Eduard Masks


 There are all sorts of tools and supplies in the modelling hobby, and it’s a fair criticism to ask if the modern hobbyist is well-served or merely gadget-dependent. When we need to mask something we use tape, like any tradesman, plus cut paper and card sections for big areas, and we may also use a liquid latex masking medium, an aid brought over from the graphic arts. I always masked my canopies with tiny slivers of tape, but there are some curved that just don’t want to be masked around. A three dimensional shape needs to be expressed in two dimensions, and that’s a hit or miss proposition unless you’re a spatial dynamics expert. Another trick is to spray the hull color on some clear decal film, cut fine strips and apply the canopy struts as decals, and there’s a lot to be said for that technique. There have been a few ideas over the years, including precut vinyl negative masks which are to be sprayed in the final colour and applied, but Eduard might have hit the best formula with their masking technology. Eduard Masks are die-cut adhesive shapes matched to the intended kit at very fine resolution, and the principle of their use is dead easy: peel them off their waxed backing paper, stick them on, spray, peel off when done. If engineering firms go by the old “KISS principle,” (which stands for Keep It Simple, Stupid!), then they’ve probably hit the money. If the hundreds of sets in their range are anything to go by, modellers agree. 


 I’ve used four sets so far and have several more in hand. Though the principle is simple, it takes a fine hand and a keen eye to get them into place precisely. Without magnifying specs I’d have no hope, though that’s more a comment on my vision than the product. The masks seem to be a vinyl or paper material, and their adhesive is quite strong, they won’t move until you want them to, and then they come away without leaving a residue. They can be repositioned, though with care as they will crease and denature if handled roughly. They fully cover smaller panels and outline larger areas, which are then filled in with liquid or tape.  


 Once located to your satisfaction, spray the cockpit interior colour, then overcoat with the camo or framing colours, and when fully dry tease up a corner with the point of a knife and draw the masks away with tweezers. You might also want to hold the canopy down with a finger as you do so. The adhesive is strong enough to pull a clear part off if attached only with clear parts cement.  


 Masks are also supplied for other parts of the model, such as wheel rims and formation lights, and some armour sets have been produced to help with the fiendish job of painting the tires of tank wheels. Hopefully we will see this range continue to grow, as their utility is considerable. Can you re-use a set? I’ve not tried yet, but if you peel them off carefully and return them to their original positions on the backing sheet, it might be possible. Two uses would be good, as they do cost a few dollars, a nonreimbursable expense on the cost of doing a model which is far greater than that of the paint one uses, and often comparable to that of a selection of AM decals. Probably the best tribute I can pay to the product is that when I decide a particular model is on my schedule, I check if Eduard have masks for it and order them up in plenty of time, just as I would order AM decals or resin bits or whatever, and that makes them a tool of choice for this particular finishing operation. I recommend them to any hobbyist with a steady hand and a magnifying glass. Eduard Masks are available in hobby shops and through many online outlets, I always order mine from Squadron Mailorder, Carolton, Texas.

Saturday, December 5, 2009

Acrylics or Enamels?


 It has to be the biggest question in model painting today, beyond choice of brushes or airbrushes, beyond colour selection: which type of paint is best for your project? There are modellers who have switched entirely to water-based acrylics for all spray work, for the health benefits: nontoxic paints are a major factor and not to be taken lightly. When you’re used to the light, sweet smell of acrylics and their water cleanup, to start spraying solvent-based paints and their spirit cleanup is a rude reminder of just how frequently and casually we poison ourselves with the things we invite into our environment. Got a spray booth with a ducted exhaust fan? Good for you, but most of us make do with an open window and sometimes it’s just not enough.

Like many modellers, I have both types of paint in stock. I first bought acrylics when tackling vinyl subjects in the early 90s, and I must say the Tamiya paints I bought have been extraordinarily long-lived. They’re still good over 15 years later, all they need is a stir. They haven’t made the old, large bottles in many years, possibly because people discovered the paint lasted remarkably well, and for the rate of usage a smaller quantity was just fine. I have scores of Tamiya shades, plenty of useful colours, and my collection grows gradually. But I also have hundreds of enamels, the ubiquitous Humbrol range and Testor Model Master (which despite being superb quality, with an easy-stir jar and an enormous selection of specialty-matched shades, is getting hard to find in Australia, as Humbrol and Tamiya have grabbed the popularity).

I have not brush painted a model in 30 years, but today when I spray enamels I do so outside, which is a nuisance. Acrylics I can use indoors with simple ventilation, which makes them easy and convenient. But what about detail painting by brush? This is where the real applicability of the paints comes to the fore. Acrylics spray superbly but they don’t brush worth a damn--at least the Taniya variety. You can thin them a little and that helps, but the drying rate is like lightning and in one minute a brush is unusable -- clean it and start over. This seems a characteristic of the Tamiya range in particular, they are by far the most available here and I have sampled no others at this time (but I’ve heard others dry even faster…)

By comparison, dipping a fine brush in enamel paint provides familiar flow and control, and one can concentrate on the finesse of the task rather than fighting the characteristics of the medium. The same thing applies when airbrushing, though on a longer timescale. When used to the tip-drying characteristics of enamel, acrylics can bite you: you must keep the job moving when you’re working with the nontoxic paints, and when it’s done be sure you’re finished and clean the AB at once. This tends to lead to wasted paint, as when forgotten bits are noticed you need to mix more, and if using a syphon-bottle AB there is a minimum amount the airbrush will actually pick up from the jar. If working in enamels you have the extra working time to consider the job from all angles, turn the thing around again, look at it in different light, go 30 seconds or more and be sure the paint will still flow normally when you press the trigger.

My impression is that enamels and acrylics will continue to share the marketplace. Enamels flow on so smoothly they are a joy to use, they are a ‘friendlier’ medium than acrylics, you can polish their finish just like automotive paints (which ironically have all been acrylics for the last 25 years at least), and the range of precision-matched shades is enormous. The major manufacturers must have churned out over a billion bottles and tinlets in the last 40 years, in fact probably far more, Humbrol alone used to produce 25 million tinlets a year in the 1980s, if I remember correctly, and that’s an awful lot of paint in collections out there. I personally have tins that date from that era and the contents still slosh. But if acrylics were friendlier, dried slower, brushed better, and were available in hundreds more shades, precision-matched to historic sources, I would be using them more often. I have no wish to poison myself, and while the chemistry involved with acrylics is almost certainly not 100% harmless, it’s a significant improvement.

Sunday, November 29, 2009

To Detail or Not to Detail, That is the Question...


I have long fancied scratchbuilding the mighty MBT-70 Main Battle Tank under development as a joint US/German project in the late 1960s. The pre-production prototype batch demonstrated great potential, and a number of its innovations appeared in other tanks on both sides of the Atlantic, but the vehicle itself was too ambitious, too costly and too unreliable. It is a long, low, mean-looking tank with unusual features, such as a driver in a stabilised cockpit in the turret, and a secondary cannon which could be operated from within. I have long pursued research, trying to untangle the differing running gear details of the US and West German versions, and one way I tried to do this was to find Aurora’s old 1:48th scale kit on eBay, to see in three dimensions how the repetitive detailing of the unique hydropneumatic suspension system was handled.

I was somewhere between surprised and disgusted when I discovered that Aurora’s solution to all that complex detail was to ignore it. No suspension detail was offered at all, which makes the kit a somewhat expensive and rather pointless addition to my stash (joining the eBay sell-on pile…) Back to the drawing board on the MBT-70 project, but that absence of detail set me thinking.

What constitutes a necessary detail for a kit?

Knowledgeable folk will tell you that not a single truly accurate and representative F/A-18 model exists in 1:72nd scale, and that is more than likely true of just about every subject, but it must be a matter of degree. Detail appropriate to the scale is a major consideration, as the resolution of detail reproduction will make it clumsy to try to include some details when they become too small. Go to the other end of the spectrum and consider the older kits in which detail in the wheel wells, even the cockpit was considered unnecessary. In the 1970s Airfix’s 1:24th scale ‘superkits’ were something of a benchmark, but while they featured significant cockpit detail (not actually complete, it should be noted), they featured no wheel well detail at all, simply the open interior of the wing with a mechanical pivot for the gimmicky retractable landing gear.

Then there’s the odd notion of including things in the kit that aren’t there on the real thing, in the name of marketability, or having to add a detail and making a genuine mess in the process. I’m thinking of the tile pattern grid Revell added to their 1:72nd scale Space Shuttle back in the 1980s… A truly overscale raised grid to represent the actually recessed micro-fine division between the ceramic tiles of the craft’s hull… I'm sure the 1:72nd scale raised representation was actually larger than the 1:1 scale recessed reality, which goes to show what accuracy counts for compared to the young buyer's expectation that something as important as the thermal tiles must be there, whether it's visible or not. The company engraved the moulds, the same approach as raised panel lines, and just as inaccurate, though compounded by the regularity of the grid over the craft’s surface. I had that kit, bought it for a great price, but a few years later I sold it on, unopened. Why? I just could not bring myself to build a hypersonic flying machine with a rugose hull texture that would shame a rhinoceros, any more than I could see my way to laboriously removing the entire grid and rescribing it. Had Revell left well alone I might have got up the chutzpah to try scribing the grid (though I’d probably have made a mess and ended up refilling it and trying some sort of paint trick, spraying through a mesh perhaps, which I once saw done to great effect on the 1:144th scale orbiter.) As it stands, though I would love a large scale shuttle, there’s no way I’d tackle the Revell offering, even with my current skill level.

I’m not entirely sure but this beast may have been retooled to switch the grid to recessed, but it would still have been way overscale. Decal company Cutting Edge went a long way to rectifying the whole accuracy problem for Orbiters with decal versions of the heat shield areas, and accurised engines and window painting masks were also produced, way back in 2003. Check them out:


So where should a kit company draw the line between what needs to be there and what needs to not be there? My gut feeling is that if the detail is recessed, recess it, and if the detail is visible at the equivalent scale viewing distance, it should be on the model. That’s a fair yardstick, with plenty of wiggle-room, and I think the best companies are probably working around just such philosophies now. Perhaps that’s called learning from the past, standing on the shoulders of yesterday’s industry and building on not just their experiences but the consequences of their choices. Models certainly look better, right out of the box, now than they ever have before, even if they are not ‘accurate’ in the sense that purists use the term. And yes, the gentle art of ‘rivet-counting’ will be another topic!

Tuesday, October 20, 2009

Product Look: Skullduggery interactive kits


 These are amazing: imagine a kit in which you need to cast the parts before assembling them!

The Skullduggery firm has perfected a system of non-toxic casting media in which kids can learn about a subject while building a display model more or less from scratch: they have fish, butterflies and of course the ever-popular dinosaurs.

When one associates injection plastic and rotation-molded vinyl with dinosaurs as the medium of choice, or solid-cast resin as the third option, to find open-molded plaster in use is at first an odd selection, but plaster can copy extremely fine detail and it’s non-toxic for junior use. 


The idea is that kids pour pre-mixed casting medium into provided plastic molds, demold the plaster parts, paint them and assemble them, a somewhat greater involvement than conventional kits offer, prolonging the educational experience without the intricacies of a conventional build-up. The kits even include paint, brushes, glue and mounting magnets, so the finished object is all ready for display.

In a way, this is kit building which incorporates scratchbuilding, and the basic principles of casting are made available to young builders at an age when it’ll become second nature and very probably serve them well in more ambitious projects in the years to come.

There’s only one drawback from the standpoint of the adult builder: though the boxes are beautifully illustrated with photographs of perfectly reassembled museum-display skeletons, the kit actually builds a two-dimensional dinosaur, a ‘panel mount’ in museum terms, in which the bones are seen in profile against a rock matrix. There’s nothing wrong with this and it certainly simplifies things for the younger builder, but it’s not quite the stand-up-and-roar display the box seems to promise. 


 The products are sold in the livery of the old Collins Eyewitness Guide books, a wonderful range of teaching volumes which assembled information on a plethora of subjects, illustrated with photographs of actual objects and artefacts. I remember their dinosaurs volume being the first I ever read, so it’s rather fitting that I encounter the range through their T. rex.

Here are some useful links – check them out, if you have kids these will provide fun, insight, education and practice for building! You’ll probably find them in Museum shops far and wide, and here in Aus at the Australian Geographic shops


Monday, October 5, 2009

Product Review: Experts’ Choice Custom Decal Papers


 Custom decals: there was a time the thought used to turn modellers green with envy, or shuddering with foreboding at the thousand things that might go wrong, but in the age of the digital revolution it’s no longer a big deal. All you need to be is computer savvy, and a bit adventurous.

Unless you have very deep pockets, you will not be making decals equivalent to the silkscreened commercial product, but you can finagle things to get close. The Alps printers that deliver an opaque white ink make commercial image quality possible, and are used by the ‘garage’ firms, but for those of us with shallower bank accounts there are clear and white decal paper stocks from a variety of manufacturers.

I first began experimenting with custom decals for my F-116 SF scratchbuild project a few years ago, and refined the techniques at the electronic level. Basically, designing the decals is as simple – or as complex – as driving the software, so that’s the first hurdle. If you can drive your graphics package well enough to make the designs you need, half the battle is won. The fictional F-116 needed stencil data and I had intended to raid a SuperScale sheet for black data from the F-15E, but it didn’t seem to fit. I needed stencils which told a technical story all over the hull, Caution - APU Exhaust, Do Not Operate if Vent Port Obstructed, Ensure Grounding Provisions, Jacking Point, and so forth, dozens of them, all over the aircraft where maintenance placards would logically be located. I did some experiments in Page Plus Professional V.10 and found that 1- to 2-point lettering was still distinctly legible and a reasonable approximation of the lettering of an aircraft 72 times larger.

The aircraft required colour decals as well, organizational flashes and the triangular national insignia of a service which does not exist. My sister made them in about ten minutes flat, in the same program, and we were ready to rock. The media I chose was the decal papers from the Experts’ Choice range (a name which tends to engender trust!). I mail ordered their clear decal film for laser printers, item #123 (for the all black data) and their white film for inkjet printers, item #120, for the insignia which featured a white area. Luckily the insignia’s straight-edge shape lent itself to cutting free of the sheet with a razor knife.

The clear film worked remarkably well. I did a number of test shots on paper and when I was happy with the design work I rolled a sheet of decal material. The stencil data was made as easily as that, and was brushed over with MicroScale Liquid Decal Film to seal the toner down. I cut the designs close using small scissors and they went on readily, reacting well to MicroScale DecalSet and DecalSol. Here is a photo of another decal sheet with all-black markings on clear film for a variety of SF scratchbuild projects: the WASP Arrowhead received the top set, which is why they’re missing from the sheet!  


 The F-116 had a long white text legend down each side of the cockpit and to do this I changed tactics slightly. I had looked at the possibility of using MicroScale white lettering but did not trust my ability to line them up and space them correctly. I settled for a sheet of small white rubdown decals by Letraset, and applied them to the clear decal film. I brushed liquid film over them, cut them out and applied the legends as single units.

If the colour decals had behaved as well as these, my job would have been a lot easier. I was building the model on a deadline at the finish and I did a number of ‘ghosters,’ modelling sessions which run right through the night, at least partially because the colour decals simply would not behave. They would not free off their backing without a very long time soaking in very hot water and a lot of coaxing with soft brushes and solvent. This meant that the majority disintegrated before they were willing to move: it was a good job I made up several sets of decals on the one sheet, I certainly worked through a lot of them to get four insignia and two flashes to take. I spoke to the company and the only suggestion they could come up with was that it was a freak incompatibility between the paper and (both) of my colour printers. 


Here’s the finished F-116, showing the black stencil data, white rubdown decals, plus colour insignia and ‘danger’ flashes. The white stripes were done with Microscale Trimfilm.  


To be fair, I have seen ‘garage’ decal firms with a high profile and a good reputation put a caveat on their work, drawing the user’s attention to the fact that they are not commercially manufactured decals and don’t behave the same way, so it may be more common than many might prefer to admit that custom decals are a hit-or-miss proposal.

The Experts’ Choice packs contain three sheets each of US letter-size paper and, at less than $2 per sheet, are excellent value. If your printers and their inks are fully compatible then you can have all kinds of decaling adventures, creating the markings of your dreams: clear sheets for solid printing to overlie a painted backing of the necessary colour, white sheets where white is a necessary element of a complex design and you are confident you can cleanly cut away every scrap of white surrounding the graphic. You can fudge this by being clever, such as by edging the design with a digital equivalent of the background colour so the trim doesn’t need to be exact for the decal edges to essentially vanish into the surface.

Custom decals are fun and open a new world of marking options, limited only by your graphics package and your skills (and the luck of the draw when it comes to compatibility, and that’s the only real downside). Otherwise, these are excellent products and highly recommended. You can find them at: http://www.Bare-Metal.com/