Showing posts with label StuG IV. Show all posts

Monday, March 28, 2011

Kits That Build Themselves (Almost)


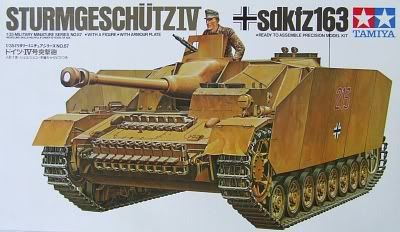
Late in 2009 I built Tamiya’s old StuG IV kit (35087) and was delighted with the easy-build characteristics of the 1970s approach to kit engineering. Dragon sophistication had not come into the world, but Dragon over-complexity had also yet to appear, and notions like slide moulding were a technical phantasm. As I’ve mentioned on occasion, while the armour kits of the 70s leave a lot to be desired by modern standards, they also had the virtue of buildability, and before the advent of Dragon, Tamiya’s only real competitiors were Esci/ERTL and odd offerings from Heller, plus the 1:32nd scale range from Monogram and the 1:40th scale series from Revell.

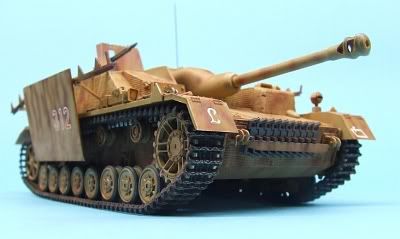
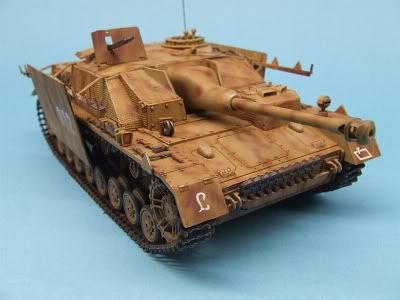
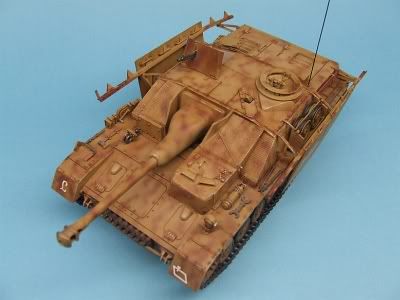
I recently found the urge to build another Tamiya StuG IV, this time the Academy issue of 1987 (from the period when a batch of older Tamiya kits fleshed out their range for market impact before their own product really got rolling). The factory example photographed for the box shows a very attractive fall ’44 ‘Ambush’ scheme complete with blowing leaves, but the markings (for what appears to be the Grossdeutschland Division, going by the helmet motif) are not included. Academy scanned Tamiya’s plans, rearranged the drawings and renumbered the parts, rather a pointless exercise if it was meant to disguise the origins of the kit, all of which rendered the plans confusing in places. I built from Tamiya plans, and referred to the Academy plans merely for part numbers on the rare occasions I couldn’t recognise them instantly.


This is a very simple kit, but its 217 components would have been an impressive total in the 70s. What strikes me about it is how easy the build is. This example fell together in about four sittings, even wasting time I doubt I spent more than five hours from go before I was encountering the need for paint. The moulds were showing their age, some parts needed extra filing and fiddling to get them to line up, some separation lines were pretty heavy, especially in the suspension, but these issues were par for the course in the 70s anyway, and compared to the Dragon StuG III F/8 I’ve had underway since last year, this one built in a blink. The indie-link Ostketten on that one put me off every time I think about them.

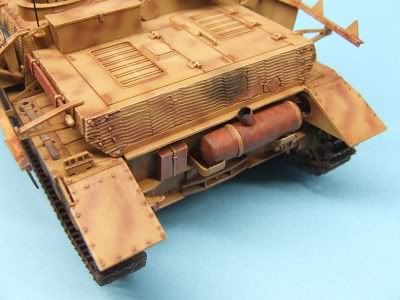
One unusual thing, there is a gap about .060” wide between the idler axle components. The rooting of the parts, moulded onto the transom, is supposed to fit against the outer axle parts which are cast with the main tub, but the parts sit back, with a pronounced cutaway. This element does not appear on the original Tamiya kit, I just checked the one in my display case and it’s not there. So did Academy retool and introduce this change for some bizarre reason? The parts do not look soft and ‘blobby’ as they would if they had been three-dimensionally traced with a pantograph. I have Academy’s issue of the Panzer IV H with stand-off armour, originally Tamiya 35057, and this difference does not appear in the transom plate of this essentially identical kit (identical as far as these components are concerned, certainly). Whatever, that left me with gaps where none should be and axle roots that don’t look convincing.


Given that it’s not the easiest part of the vehicle to see, I decided a perfect fix was not required, and sufficed to shim the gap with a sliver of 4.8mm tubing to create a mechanical illusion of completeness. A proper fix would have been to shim it with sheet plastic and carve the plastic to match the structures adjoining, and this would have been possible before assembly, but that much knife and file work when there are finished structures in close proximity seemed like asking for trouble. This is a simple build, I want it finished, not living on my bench. Filling in the slots behind the axle mounts with strip plastic was also a simple enough process, and created the impression once again of mechanical detail, barely-seen.

Modelling is meant to be about fun, and the simplicity of the engineering lends itself to prompt assembly while the age of the moulds inescapably exercises the skill muscles to compensate. In that much, it’s a good mix. The artistic muscles come next: I’ve never done an ‘Ambush’ scheme before, and have not dialled the airbrush down for tight soft-edge freehand spraying in two or three years. Maybe it’s time to give that technique a whirl again.

Thursday, January 21, 2010

Product Review: Cavalier Zimmerit


Australian firm Cavalier Model Productions has been around for quite a few years now, and besides their resin car kits and other esoteric goodies, they are perhaps most famous for their Zimmerit. Zimmerit was an antimagnetic paste applied like cement to the hulls of German armoured vehicles in the middle years of World War II (discontinued around November 1944) in response to the Russian tactic of magnetic mines which could be attached by infantrymen. Many choice modelling subjects are properly depicted with a coat of this rough, rippled stuff, and while there are many techniques for creating the effect, and some manufacturers, notably Dragon, have made forays into producing it as a moulded detail, Cavalier’s solution has been very successful and very popular.

Basically, Cavalier zimmerit is a wafer-thin sheet of moulded grey resin, as thin as paper and highly flexible. It’s delicate but captures the texture perfectly, including damage and defects in application for an amazingly realistic effect. Some 35 sets are presently available, including a batch for the new 1:48th scale armour, though most are for traditional 1:35th scale, with specific sets designed for particular kits. Fiddly parts are reproduced from kit parts with zimmerit added, so you have a complete replacement part. All sheets are cast in a uniform pale grey resin.

High utility can be found with their generic sheets too. If your vehicle is not covered by their sets of pre-formed parts, you can buy a generic sheet (there are four different patterns available) and you’ll more than likely have all you need for your project.

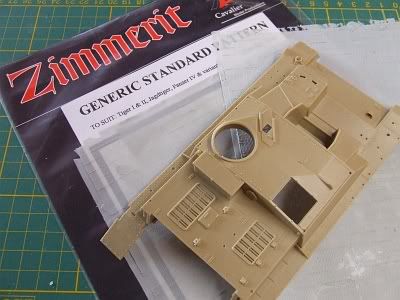
That’s what I did, working on Tamiya’s old (but still excellent) StuG IV kit (35087), as mentioned in the last post. No specific set has been produced for this kit, so I ordered up set CV-118, generic standard pattern zimmerit, and basically cut the parts as required. The set is very generous, containing two 15.5cm x 21cm sheets, and the whole project took me around half a sheet: that’s great value, panning out at about Aus$5 to zim each of potentially four models.


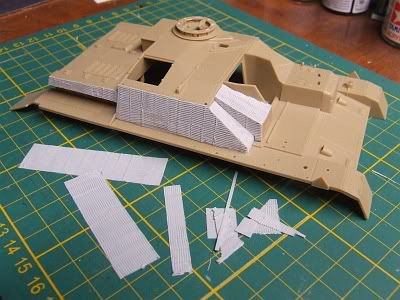
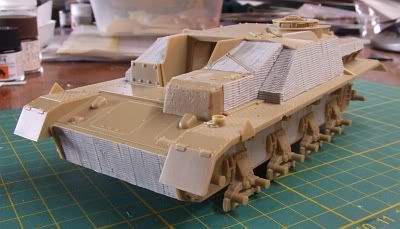
Starting from one symmetrical corner of the sheet, I began by measuring up needed panels and cutting them out with knife and straightedge. I cut them a fraction large, especially allowing the inclined edges of panels to lie inside the edges of the pieces I was cutting (photo, below). The method in this madness will soon become apparent. One needs to remember the orientation of the pattern, check references and see which way the pattern runs on which surfaces, and cut components accordingly.


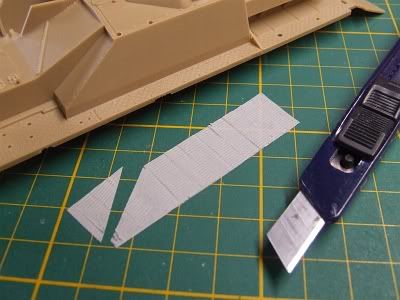
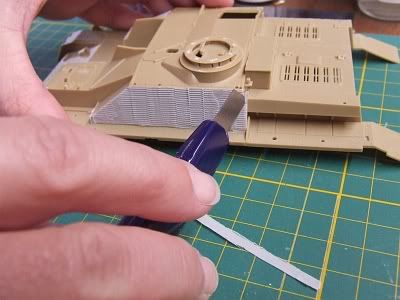
There are several suitable adhesives to use with this resin, five-minute epoxy, for instance. I used regular superglue as, given the fact I would be trimming the edges afterward, absolute precision was not called for. If using one of the pre-formed sets, I would use slow-cure gel superglue, for its strength and because it allows time to both spread the glue completely over the back of the sheet (as in the next photo) and to slip, or remove and replace, the piece once in place to refine the fit. As each piece was secured, simply by pressing carefully into place (second next photo), the slight excess left at the edges was trimmed with a sharp blade, creating an essentially perfect fit (third next photo). Any points on the edges that were not fully secured were glued down with thin CA, brushed on sparingly, then the edges were lightly filed to virtually blend the resin sheets together.


It is worth doctoring the zimmerit as well, you can score and chip the edges in high-wear areas, the likely contact zones, to create damage, chunks of the cement-like matter either chipped away by contact with branches or obstructions, or shattered free by the impact of shot. It’s as easy as cutting in with a knife or the edge of a file.

The sets come with a zimmerit tool, a cast resin ‘rake’ for custom work using one of the standard techniques. Basically, in areas where the zimmerit doesn’t quite fit, or edges where the juncture of sheets did not come out as perfectly as you might have wished, you can paint on some thinned putty, wait until it’s firming up, then score the pattern into it to match the resin sheets around about.


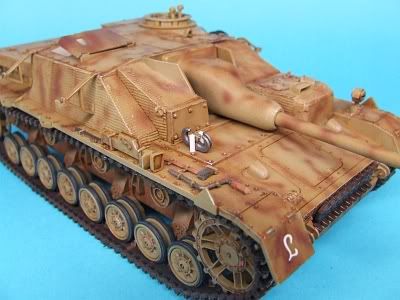
The complete zim job on this model took several hours to do, and it was my first outing with the product -- I’ll probably be quicker in future. Here she is with some paint on, late in the finishing stage:


I couldn’t be happier with the result, and look forward to more Cavalier zimmerit-enhanced German armour models to come.

You can find some sheets at better hobby stores, but for the full range go to:

http://www.cavaliermodels.com/Zimmerit.html

Here you’ll find an historic article on the stuff, including reference photos, plus a listing of all available sets. At Aus$19.99 each they are a good buy, and domestic postage of $3.95 is no blow to the wallet.

This is a first-rate product, highly recommended, and proudly Australian!

Thursday, January 14, 2010

Recently Completed: Tamiya StuG IV


This kit (#35087) has been around for a very long time, thirty years or more, and in general one expects toolings of that age to fall down on the job by comparison to the new stuff. In recent years it was widely speculated that Tamiya were backing out of the 1:35th scale armour game, leaving it to the prolific releases of Dragon and Trumpeter that were making such an onslaught in the marketplace, but among Tamiya’s updatings to get new life from old moulds there have been a series of gems, their T-55, JS-3, Char B-1, Leclerc, and the brand new ISU-152. Tamiya has always been characterised by “buildability first,” catering to the younger or less experienced modeller by engineering their models to build well, something Dragon started to do with their “Smart Kit” range about thirty years after Mr. Tamiya made it policy. So just how do older kits build?


I wanted to do this one for many years. I was inspired by Glen Phillips’ build-up and detailing techniques in the May 1991 FineScale Modeler, and hunted out a StuG IV which I bought from a second hand dealer in Japan, but it was many years before I could get around to it. For one thing, I had to figure out how to make an airbrush spray fine lines, as the rotbraun mottle was far finer than anything I had ever sprayed before, and these skills did not come easily. And there was the matter of Zimmerit, a prepossessing task when it involves plastering putty all over a model and scraping it to make that characteristic ridged pattern.

The second problem was the easier to solve. Cavalier Model Products to the rescue – see my upcoming review of the brilliant Cavalier product for the low down on how to get a superb rippled finish on your German armour, if you’ve not already used this terrific texturing medium.

The first was solved about a year ago when I did some experiments to spray a more convincing, true-to-the-research, disruptive scheme on my Academy Tiger I Early, and I found that I had a formula for getting tight edges and fine demarcations (at last) from my Paasche VL.


Armed with these and other tools (such as the Alliance Model Works photoetched mask set for tank wheel rims, reviewed last time), I built the old StuG and was very pleasantly surprised. The parts fit was excellent throughout, there were no dramas, no fights, except for one track which would not couple. I shaved away the pins and superglued the ends together, problem solved; I’m not sure I even class that as a problem.

The kit has lots of options: two lengths of spare track to mount in a couple of possible locations; schkurtzen standoff armour and mounting rails, none, one or two radio antennas, moulded concrete frontal slabs for late-serving vehicles, open or closed hatches, a figure, deployed or stowed MG shield, posable scissors-sighting gear, plus a suite of divisional insignia and several sets of vehicle numbers, allowing you to either follow the kit suggestions for final subject vehicles or do your own research and paint it however you like. There’s plenty you can do with this kit to build several and never have two look even substantially similar.


Another thing I like is the fact that all the wheels rotate, with the exception of the return rollers. Some later kits don’t do this, and while link-and-length tracks are of course rigid, and Tamiya engineered their early-era kits in the days when motorisation for “toy appeal” was in, it’s always somewhat cool to see your model’s running gear actually work on a rough surface.

In terms of accuracy, there were a few details that Tamiya missed out, probably due to the limitations of moulding. The kit belongs to the era of open sponsons, and if you’re having any open hatches it’s a good idea to do a bit of scratchbuilding and close the hull to avoid a see-through effect if viewing from above. The standoff plates and rails are overscale, of course, they were in reality 5mm armour plate but if you multiply the kit parts by their stated scale you find they would be more like 30mm or more. There are photoetched replacements for many vehicles out there, plates and racks alike, but I simply sanded mine down on wet’n’dry paper to thin them a little. The plates are cast as single units but they were in reality separate plates along the hull. You can cut the plates from their neighbours to get this effect as an irregularity in the way they hang from the mounts.


The age of some of the components is probably close to forty years, as the lower hull is shared in common with their other Panzer IV kits and Pz. IV-derived subjects (Brumbar, FlakPanzer, Jagdpanzer etc.), the earliest of which were definitely early 1970s releases.

I would have to say this kit, while simple by today’s standards, is remarkably good. It builds a sturdy, appealing product, is a project which early-career modellers can tackle adequately due to the builder-friendly design, and there are quite enough options and room for scratchbuilding to keep experts happy also. There are uncountable numbers of Pz. IV accessories on the market, and many would be appropriate for the StuG, such as damaged roadwheels, better-quality external tools, photoetched fittings, replacement tracks, and decal sets for a wider choice of markings and schemes.


It took quite a lot of methodical work to get it finished, but I can’t say there was a particularly difficult bit anywhere in the project, and I will certainly be building others. My next StuG IV will be minus zimmerit and skirts, and be wearing three-tone ambush camo. In conclusion, I recommend this kit to any modeller: beginners should find it a bit of a challenge but by no means impossible, while styrene experten may find it a refreshing simplification compared to Dragon’s policy of ‘never use one part where five will do.’ As an older kit it’s also cheaper by far than the new-tool products, around half the shelf price, though they change hands often enough on eBay for a fraction of that.

Sunday, January 10, 2010

Product Review: Alliance Model Works Painting Masks


 Now here is a truly good idea! The template painting method for wheels has been around for quite a while and it makes a slow, tedious, “iffy” job into a quick, accurate one, but one painful truth is that models are a scale depiction of reality and as such it’s always a lottery as to whether artists’ circle templates, which are produced on whole millimetre increments (they don’t seem to make half-mil sizes) ever match closely the size of the wheels. After you’re done spraying you always need to take a fine brush and clean up those edges by hand, hoping the ridge of the rim will guide the brush adequately to fool the eye. For a Panzer IV, with 36 wheels (counting the spares), all of which should correctly be rimmed both sides because you can see the hub area of the rearmost of each wheel pair from oblique angles, that’s a formidable task. But Alliance Model Works have come to the rescue with photoetched painting masks, circle templates designed to fit the rims of specific kits from specific manufacturers.  

 I ordered their set for WWII Wermacht tanks and other vehicles on eBay. #Lw3574, “German Vehicle Wheel Mask Set” comes attractively packaged in a conventional plastic and card sleeve, containing a sheet of instructions on the use of the product and no less than three frets of etched stainless steel, plus one ‘loose’ mask for a total of 54 templates for roadwheels, return rollers, and the steering wheels of halftracks, plus even the wheels of some towed fieldguns. These are precision-made items designed to fit exactly over the rims of kits by Tamiya, Dragon and others, which means no more touch-ups: once spraying is done, you should be finished the job. As soon as I saw these gleaming, individually-plastic wrapped frets I smiled and said to myself, “if these work as advertised, a hard job just became easy.”  


 I tested them on the Tamiya StuG IV crossing my bench at the time. I had delayed doing the wheels til last, and I was very glad I had. The first step was to paint all the tyres black, for which I mixed Tamiya XF-63 Panzer Grey with X-18 Satin Black for a low-lustre tyre black (1:1) and sprayed the wheels on the sprue for ease of handling, with their mating faces masked with Humbrol Maskol and some wet tissue. So far so good. Then I cut the protective plastic over the appropriate PE sheet and test fit a wheel hub into the “Tamiya Panzer IV” template. Well, I certainly hope it fits the new-tool Tamiya IVs, because it sure doesn’t fit the old ones! Why can’t anything ever be easy? Would it have been too difficult to have the new and old-tool kits (which are still widely available under more than one label) catered to, side by side? I had a choice: use the specified template, biased to slip around the rim on one side only, then come back for a second pass to get the other side of the rim with the template biased the opposite way, or find another template which was large enough and fit close enough to do. Compromise is not what you expect from a precision product, and not what was advertised, but I guess the company is playing to the high end of the market, and nobody said anything about the vintage of the kits catered to by this specific set: there may be another set with the older Tamiya Panzer IVs among it’s many template sizes. I don’t know, I haven’t checked – yet. The good news is the template for Dragon’s Panzer III is quite close enough to do. I stripped the protective plastic away and test fit a hub, finding the clearance quite snug enough for my purposes. The rear wheel of the old Tamiya IV seems to be a smaller rim diameter, but the backs of the wheels are not going to be seen much, so some overspray won’t make any difference. I could have taken the template from the PE sheet but for ease of handling and storage I decided to leave them all of a piece. This is how I’m used to handling plastic circle templates to do the job in the past. I masked close round the hole with tape to keep the product clean overall, then trimmed the wheels from the sprue, leaving the attachment points to be dabbed into the mixed black at a later point (before weathering).  


 I mixed Tamiya XF-60 at 1:0.5 and shot at my usual pressure for the Paasche #3 tip and needle, and did two mixings, one for the fronts, one for the backs, and had enough to double coat a fair few hubs in each batch. The metal sure collects overspray, moreso perhaps than plastic templates seemed to, I had to keep wiping the paint away with a moistened tissue, but that’s to be expected and no problem to deal with. The best news is they work great. Any remaining degree of “wiggle room” is due to the fact I’m using them on a kit they were not designed for, but they’re a lot closer to right than standard template sizes, so the job was right in the end. I know how well they’ll perform when I build a Dragon IV, or III, or whatever else actually on the sheets comes up for building. They were on special but not cheap: still, as a precision tool that will serve me for many years, I consider it one of my better investments. Now when I build German armour, I will reach for these masks as a reflex, and the prospect of the running gear will not be a detraction from the fun of the project. Look at the finished job (mains and spare wheels, prior to fitting the stand-off skirts) and there was no hair-tearing involved in getting there:  


Very highly recommended – I suddenly find myself considering collecting any other mask sets they offer, American armour, Russian armour, they all have rims to paint! Check out the product at http://alliancemodelworks.com/ There’s a retrospective look at the old Tamiya Sturmgeschutz coming next time, watch this space…