Monday, June 22, 2009

Product Review: Microscale Micro Metal Foil Adhesive


South Australia is slightly over the edge of the world. You can’t get stuff here... I inquired at the biggest hobby shop in town about a polishing kit to develop a glass-like shine on gloss enamels and was told that, while they had heard of them, there was no point stocking them, as nobody (presumably besides myself) would ever buy one in this town. Just the same, Model Master Enamels are going out of stock here at mainstream stores, they’re just not popular enough compared with Humbrol Enamels or Tamiya Acrylics, so the biggest shop in town is not going to restock, and they never had the full range anyway. If you need precise matches to historic colours, you’re off to a specialist stockist...

So I actually had a bit of luck lately when I needed Microscale’s Micro Metal Foil Adhesive. It was the right product for the job, and this time it turned out the shop actually did have in stock what I needed. I call it blind luck, as of all Microscale’s wide range of great finishing products, this was the only one they actually stocked (and no, their nearest competitor has never heard of the range...)

Rant aside, this is a good product! It smells like PVA white glue, looks like it, albeit water-thin, but it grips like PVA never did. And it seems to be water-based, as you can clean up with water until it’s cured, and with paint thinner afterward. It dries pretty quickly, a minute or two and it’s off provided you’re only using a small amount. 


 It’s easy to use. Cut a piece of foil, brush the glue onto the back and wait until the ‘milky’ appearance has gone, then apply it to your model. There’s some slippage time, but if you time it just right it’ll grab pretty quick. Applying it firmly over a smooth surface, you can then burnish the foil to a smooth, gleaming finish. In my case, I was applying crumpled gold foil to a Lunar Module to replicate the gold Mylar thermal insulation of the Descent Stage, so a burnished final appearance was not involved. This was just as well, as I found the glue did not hold very well on the small sticking area of tiny, curved surfaces, so my application did not wrap tightly to the struts. In context it created a suitably bulky, ‘packed’ appearance just like the original, but I found you need to work with larger diameters of tubing to get a firm, tight contact between foil and plastic. 


 Nevertheless, I was impressed. As with every Microscale product I’ve tried (with the exception of Trimfilm, but that’s another story), it works as advertised, is very economical and non-messy. This is a recommended product.


As a water-based formula it’s okay to send through the post (like Talon Acrylics), as US airmail won’t touch so many hobby products any more. That’s another post too...

Friday, June 19, 2009

Accuracy, Out of Inaccuracy

Aurora -- the name brings back rosey-eyed memories of many an afternoon spent with glue and paint as a child, not that I could afford many Auroras. I remember a shop that stocked them in the early 1970s, the square-box edition with those imposing paintings, their movie monsters series in particular. I bought their King Kong and was very impressed by that powerful figure. I’ve often wondered what I could do with that kit with my current techniques.
 

 But the Aurora I’m thinking of is somewhat different. It was said by a reviewer that Aurora’s aircraft were always suspect, and the older the kits the more likely they were to be suspicious as to their accuracy and fit. Aurora’s B-58 Bomber (#375) was tooled in 1958, I managed to find an unmade 1958 example (long box) on eBay, for a reasonable price (some parts had been assembled, several were painted, and they were detached from their sprues). I needed it to mold off some parts to build some SF studio replicas -- TV FX miniatures built in the 60s which used B-58 parts from this kit -- and in that much it will suit its purpose perfectly. But the kit itself is a...disaster!

It’s the wrong shape. Not one single part of it is accurate. Not the proportional sizes, not the contours. The engines are way too fat, the tailplane is all over the map, the wings are the wrong size. There are raised decal guides on the surface... How this model could have remained in production for so long is a total amazement. Revell’s and Monogram’s early offerings may not have been up to scratch by modern standards but they were rather better than this. Italeri’s #1142 is by far the best B-58 in the scale, no wonder it fetches the prices it does on eBay these days: maybe Italeri will take notice of this and reissue the kit again, as they did about five (?) years ago.
 

 Here’s a comparison, the Aurora (top) and Italeri (bottom) engines, the latter being accurate and in fact the larger scale!


 And here are the fuselages and tails, Aurora at the top, then Lindberg and Italeri at the bottom. They seem like three different aircraft.


And on the subject of scale -- the classic Aurora is always reputed to be 1:64th, but the stated scale is ‘5/32nd” (to the foot)’, which goes through the calculator thus: 12” x 1/32nd” = 384/32nds, divided by 5 = 76.8th scale. This is almost the same as Lindberg’s (somewhat better) kit, which compared to the real aircraft scales out at 1/78th, and accounts for why the parts are smaller than Italeri’s (which is a -- more accurate -- 1:72). Unless Aurora tooled a larger B-58 (as they tooled a much smaller one at 1:180th, released these days by Addar), I’m mystified at the general air of confusion surrounding this kit.
 

 Incidentally, Lindberg’s has also been deemed 1:64, which it isn’t. The stated scale is 3/16th”=1’, which calculates out at 1/64th okay, but when you measure the components and compare them to the real aircraft, it’s noticeably the smallest of the three.

Will I ever assemble the Aurora Hustler? No. But I’ll use plenty of castings from those components to build entirely accurate replicas of the science fiction craft which used its parts: therein lies actual accuracy, which, ironically, stems from inaccuracy as its basis!

Monday, June 15, 2009

WIP: Hasegawa Bf 109 K-4: Tweaking the Details

I recently blogged about my disgruntlement with the cockpit design and fit of Hasegawa’s Bf 109s, and I might have given something of a negative view of the K-4 kit at that time. The fact is it’s a very good model, with almost all of it’s bits in the right place, and there are very few things to correct. It’s more a case of adding what the company left out, either for reasons of economy or the limitations of molding.  


 For instance, the jacks that actuate the flaps of the three radiator scoops are missing, and are always visible on the real aircraft, so deserve to be added. A few milimeters of .020” micro-rod fixes the problem. The wing rads simply had slivers of rod glued in before the wing was closed, while the chin scoop and the target point on the midline were drilled through and a small piece of rod superglued in after the scoop was attached. The end was then trimmed and filed smooth, and the job was done.  


 And there’s the area behind the headrest. This is the only area where detail is explicitly incorrect for the K-4, as a square bulge molded into the fuselage halves represents the battery cover of the G-10 version, while in the later mark the battery was relocated so as not to intrude into the cockpit. Ideally this area should have been a separate detail part with simply a locator hole on the fuselage midline joint, then the differing detail could have been accurately captured with alternate parts to peg into it. No attempt was made to depict the battery access hatch and canopy locking bar found in this area, and the kit is without a seat harness. I scratchbuilt the missing details from .010” sheet, .020” x .040” strip and .020” rod, below:  


Does this count as correcting the kit, or simply beefing up the detail? The latter, I feel, as the kit is almost entirely correct in everything it offers, it just doesn’t offer everything, and in this scale few companies do. I’m certainly not a detailaholic, I’m not creating a pilot’s oxygen hose from guitar string, or installing a resin cockpit with film-and-PE instruments. I get my biggest thrill from the painting and decal stage, and want to get to it sooner rather than later.

Here’s the extra detail painted and weathered with oil wash and enamel drybrushing to dirty it up enough to look used through the clear parts:  


What else is there to do for this one? Many would go to town on the gear bays, they are a bit spartan, but I think I’ll restrict myself to taking a crack at hydraulic lines made from thin detailing wire. Next step – research, if this plane had them, what did they look like?

I’ve no doubt this kit will be spectacular when finished, and that I’ll add another (or two) to my stash one day. Maybe I should complain less and enjoy the process of building more!

Friday, June 12, 2009

Minute Details: Resin Replacements or Go With the Kit Bits?


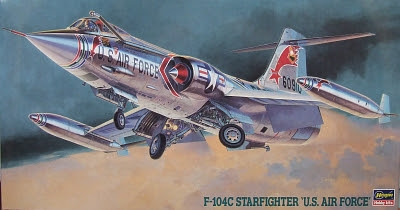
 I was working on the Hasegawa 1:48 F-104C and found myself thinking what great engineering it features. So many options, so much detail! The recessed surface detail is incredible, and the five-part wings boggle the mind when you’re used to those thin, thin Starfighter wings having been single-part castings in (probably) every kit before. What really made me stop and think was when I was assembling the 13-part ejector seat. The seat itself fits back against the fixed guide assembly, and until you add glue, it actually slides on the very rails which in the real thing constitute the ramp to guide the rocket projectile (the seat) out of the cockpit. I find myself asking, why would I bother going to the expense of replacing this seat with a single block of molded resin?  


 Sure, I have the Black Box conversion set to modify the kit to Canadian standard, and the resin cockpit is fantastic, with molded in seat and harness and such. The proportions do look rather different when you compare the tubs, and the knee-jerk is to say the resin one must be the accurate one, because, well, it’s an aftermarket resin! (Ever tried stuffing a Verlinden transmission and final drives into a Panzer IV hull? I’ve heard it can reduce a seasoned pro to tears, which suggests either the hull or the AMs are inaccurate: they can’t both be right, or they’d fit.) But unless you’re building an open cockpit to show off all that detail, it does tend to get lost in the gloom. There’s satisfaction in knowing all the details are there, but frustration in spending a long time creating it, only to have it disappear when the project is finished. For a closed cockpit I would most definitely go with the kit parts, and for open ones too under most circumstances. I will certainly be building more Hasegawa Starfighters in the years ahead, the subject is just too appealing to ignore! The kit itself has such a wealth of detail that sometimes resin is ‘gilding the lilley,’ as it were, while older (and more affordable kits) which cry out for a resin helping hand, are almost universally ignored, which doesn’t seem fair... This is a theme for another post.

Monday, June 8, 2009

Product Review: Echelon Decals


 Echelon is one of those small (not so small anymore!) manufacturers with both skill and a real enthusiasm on their side. Based in Singapore, Echelon specialises in armour decals, mining World War II for rare and interesting Allied and Axis schemes, as well as investing considerable effort in documenting the US armour formations of Desert Storm and OIF. They have also created a unique range of reflective adhesive-foil die-cut parts to represent the driving mirrors of peace-time armoured vehicles, a more realistic option than the old silver paint can ever be.

Releases range from small, single-subject sheets, to large sheets with multiple subjects, accompanied by excellent full-colour instructions generated off computer printers. The great news is Echelon is one of those lines that some Asian dealers sell postage-free anywhere in the world, for instance Spearheads Frontier in Singapore (the originating source) and Lucky Model in Hong Kong, who stock the full range.

Featured above are a couple of their more compact offerings: one of their Desert Storm sheets, #356025, an M1A1 named ‘Atlas,’ a typical beast with chevrons and Tact Board, and the classic wolf’s head insignia (slightly puzzling to the casual glance, given that this vehicle belonged to ‘Tiger’ regiment). This is one of their small sheets, about 2” square, with a computer-generated 14 x 8 cm instruction sheet. The other, slightly smaller sheet, is a German WWII subject, a small collection of crosses and insignia for StuG IIIs on the Russian front, #356033, and you’ll note some decals are used.  


I used them last year on a Tamiya StuG III/G (35197) seen above, using markings for the StuG brigade of “Das Reich” at the Kursk Salient in summer 1943. I painted with Tamiya acrylics and the very thin, very strong decals went down perfectly without glosscoating, and with no silvering at all. They are a little glossy, some clear flat before application would help with this. I have a late Panzer IV on my build list for this year and I’ll certainly be using Echelons as their quality of manufacture and depth of research make them an obvious solution.

If you’re after unusual subject choices, manufactured to full professional quality, at competitive prices and even postage-free anywhere in the world, Echelon is fast becoming a range of choice. I certainly have them in my stash!

Friday, June 5, 2009

Recently Completed: Tamiya Type 74 MBT


 This model was something of a milestone for me as I had previously only worked in enamel paints on armour. For this one I decided to give a full acrylic paintjob a go, especially as the correct shade for JGSDF Green was standard stock in Tamiya’s range. I won the kit on eBay for a bargain price. It’s the original edition, MM-214, from the days of Tamiya’s partnership with MRC for North American distribution, distinct from the current version of the kit which has markings for a winter scheme.


 The Japanese Type 74 was Japan’s second indigenous post-war MBT and incorporated concepts pioneered by the US/German MBT-70, such as independent, fully-adjustable suspension, and the British L-7 rifled 105mm gun used a few years later on the early production M1, plus laser rangefinder, IR night vision systems and multiple other state of the art refinements for the 1969 – 1975 period. In other ways the tank is very traditional, with the ballistic formula and running gear of the T-34 very apparent.  


The model builds a breeze, it more or less falls together, and has some interesting options, including a wading configuration with vertical exhausts and hatch tower, and posable suspension for a diorama depicting the vehicle on either uneven ground or in ‘kneeling’ mode, in which greater depression or elevation angle was obtained by compressing the hydropneumatic suspension system. There is even a tool for creating a symmetrical offset of the suspension arms. Other features include two figures and a variety of markings for service and training units. The only fiddly bit was the small turret basket which used a lot of CA and taxed my patience somewhat. Less fiddly was the necessity to mount the IR searchlight after applying the forward turret decals, which came out looking most realistic. The kit shows its age in some ways, such as an absence of periscopes under the armoured covers of the driver’s hatch, and no amount of stretching or reverse bending would take the fold-kink out of the vinyl tracks.  


As I began, this was my first acrylic basecoat on armour, and I was very pleased with the result, going on to do a standard triple tonal variation, a lightened shade sprayed into the middle of panels and a darkened shade to the edges as post-shading, which came out particularly effectively on the flank hull. I enjoyed the smooth simplicity of oil wash weathering over the base: I pin-washed as usual, but did some streaking and dirt build-up on the lower hull with soft brushes. I had intended to try clearcoats for applying the prominent decals to the turret, but Tamiya’s decals went on perfectly over the flat finish, so I did not extend things to that range of techniques.  


After that I mounted the antennas from .015” spring steel wire, and used MiG pigments to dust the hull, tracks and running gear. In retrospect the dusting job might have been a bit heavy-handed and I’m toying with the idea of wasing it away and starting again, more subtly, but once again this would be an experiment, I would first study the washing characteristic of the pigment on scrap plastic so as not to turn an aesthetic doubt into a disaster.  


I built this model in 2008 and am very happy with the result (okay, a gap opened up between mantlet and turret in the time she’s been standing, and I’ll have to repair that... Who says model vehicles don’t need maintenance?!) So happy, I have adopted this general suite of techniques as my standard armour finishing procedure and may never spray a tank with enamels again, unless the necessary colour is simply unobtainable and unmixable.