Showing posts with label Bf 109. Show all posts

Wednesday, December 24, 2025

Winter Warrior: Arii Bf 109 G-6

First of all, I have to say I'm shocked to learn I haven't posted in a year, but I've been very busy these last twelve months, delivering five book-length projects to publishers, and have only two competed models in the same period (it might be three by the end of the year if I really try!) So, apologies aside (including for the fact I didn't blog my 1:72 Leopard II from mid-year), here's an installment of the hobby saga from my workbench...)

I’ve long been fascinated by the Arii kits of the 70s, perhaps the first outing for engraved surface detail as we know it today, which only began to replace raised detail in the late 80s-90s period. These were sturdy, buildable kits with good outline, and while their details are few and soft by today’s standards, they can still look good on the shelf with some elbow-grease.

The object with this one was to make a proverbial silk purse from a sow’s ear, by drafting in as many aftermarket parts and features as possible. True Details wheels, Quickboost propeller, seat, joystick and gunsight, Eduard harness, brass cowl guns, Third Group decals (48-042)... I could have (and should have) added a few more, such as Quickboost pitot tube and Squadron canopy. There are Hasegawa parts here too: the SC250 bomb and it’s rack (this is the G-6/R-1 subtype), plus the supercharger intake, were unused parts from a Hasegawa sprue, and helped nicely. Certainly, even with the project officially done, there are still some parts I’ll change when I can.

This is my first ever winter camo scheme—an unidentified aircraft of 2nd Staffel, JG 51 on the Russian front, spring, 1944. The idea was to evoke a field-applied whitewash, so I prepainted in black for a see-through look in the colour coat. Overall, it came out grimy enough to look like a recently-applied but already weathering field finish.

The basic build was straight forward, with relatively few parts. Swapping the cockpit details was easy enough, and I added the G-6’s distinctive yellow fuel pipe on the cockpit starboard wall from bent plastic rod. The biggest modification was to fit the propeller, which required the whole nose bulkhead to be cut away into a circular opening which would accept the cast stub of the new prop (which does not turn). The QB unit looks great when painted and weathered (my first time using a silver pencil for bare metal chipping on the leading edges of the blades), and was the last subassembly to be fitted. The wheels were more hassle than they should have been, rather refusing to accept the kit axles, so in the end superglue and patience were the order of the day.

The kit canopy was very poor, in both fit and clarity. Perhaps the plastic is simply too old (I’m not sure of the manufacture vintage of this example), but the one-piece clear part is a bit smoky and as a result the dark grey interior is almost invisible—very frustrating after the work that went into it. Squadron make a vacform canopy set for the Arii kit, but it’s the later Erla Haube, which is incorrect for the individual aircraft I wanted to model. The Arii kit has very specific seating dimensions too, so a canopy made for other kits will probably fit poorly all the same—and the kit part fit where it touched!

Same with the masks—an Eduard set for Hasegawa did not really match up, and was adjusted with custom-cut tape, which more or less did the job. We mask canopies because we don’t trust ourselves to freehand the struts with a brush (of course we don’t!) but the masks in this instance left such a hit-and-miss job that I ended up correcting them...freehand with a brush. It makes you wonder why you bother, sometimes. A sharpened matchstick was used to scrape away excess paint, and Tamiya polishing compound was applied with a Q-tip to clean up the plastic—not that it worked very well.

The Third Group decals were printed by Superscale so their application and finish are guaranteed quantities, and they went on very nicely over a paintjob of Tamiya Acrylics and Microscale clearcoats. Of course, it was only when I was nearly finished that a few tiny details occurred to me, like drilling out the exhaust stubs for an open look, which I should have done back at the beginning, (I got the Quickboost exhausts, too, but could see no way to engineer them into the model, so ended up not bothering.)

Arii tooled the main gear with the shock struts fully extended, as if the plane is in the air, a shortcoming of many kits for some reason. There are replacement white metal struts by SAC but the degree of compression designed into them is so small you could blink and miss it. The difference is only a couple of millimetres, so I let that one slide.

At the end of the day, there are nagging issues—I measured the yellow areas under the wingtips incorrectly, so the underside insignia are each about 5mm too close to the centreline. The flank insignia are slightly too large for the subject. The RDF loop antenna is way overscale and out of shape, and I’ll source a replacement if I can find one, or scratch build it, perhaps shaping detailing wire around a brush handle. The kit part is attached with thick whiteglue, which has only slightly more sticking power than spit, so it’ll pop off easily when the time comes. Same with the kit pitot (push fit only), which will get changed out for a QB part in due course.

I meant to rig an antenna wire from Ezy-Line, but the radio mast fits so poorly into the canopy that I’m afraid the pull of the line will just drag it free, so there’s a simplification...

Was it worth the work, time and the cost of all the accessories? Compared to the price of, say, the new tool Tamiya G-6, I’m probably still into pocket but in fairness the result is nowhere near what I would expect from the new kit. There’s much said about the challenge being the important part, that shake-n-bake kits do not make for real modelling skill, and this is true—but after the time, money and effort, I’m not super-impressed with my own result. I have another Arii G-6 in my stash, and I might repeat the process, knowing what I do, and using up the duplicate parts from the AM sets—but I don’t think I’d actually buy another. One experiment was enough!

Merry Christmas,


Mike Adamson


Thursday, December 15, 2022

Tamegawa and the Case for Retooling


(This post was first published on June 1st, 2009. In the course of updating the image files for better quality and to retire Photobucket as the image vendor, the original post seems to have been lost, which is very annoying as this new version now appears thirteen years out of synch with its neighbours! Appologies...)

The giants from Shizuoka City need no introduction, there must be very few modellers in the world who don’t have Hasegawa and Tamiya kits in their stash. I find myself trying consciously not to talk too much about Tamiya, I don’t want to bias the content of this blog or have it become a Tamiya fan club, but quality does deserve to be discussed as and where it is encountered.

Hasegawa is a company for which I have had the greatest respect for the last 25 years, and I have a great many of their aircraft in my stash. I recently had reason to pull out their Bf 109 K-4 and was very pleased with the engineering, the look of the parts and the overall general accuracy. Detail by detail, she matches up with research for a very fair K-4. A few details can be added from styrene, you need to cut away the battery box of the G-10 behind the headrest and make the access hatch and canopy locking bars from scratch, but that’s easy enough. Same with adding the radiator actuator struts and some stiffeners inside the split flaps. The fuselage detailing right and left of the centreline doesn’t quite match up, but given that this kit was probably engineered in the earlier days of CAD-CAM, that’s fair enough.

One might expect the fact that the kit shares multiple parts for the G-6 and G-10 versions to cause problems with fit and engineering, this is fairly common. Indeed there are three instrument panels, redundant drop tanks and cannon gondolas, all sorts of bits not needed for the subject in hand, but they don’t seem to be a problem. In the old days Airfix would have sold this kit as the Bf 109 G/K, with instructions for using all the parts, and marking options for each type included on the sheet. (Remember their F-4 Phantom, with options to build the B, C, D, E and J all in the one box? Not a great kit but a versatile one with heaps of options.) Then companies discovered their range looked a lot bigger if they packaged the kit for each option separately, and each issue simply contained redundant parts.

But that’s by the by, the point of this post is that there is always room for improvement, and sometimes in ways you’d not expect.

I have completed two Tamiya 1:48th scale WWII fighters in the recent past, a Bf 109 E-3 and a P-51D. I was very impressed with their accuracy and ease of construction, and the quality of engineering throughout, and I was essentially expecting the Hasegawa engineering to be on a par. Overall it is, parts-fit is superb, dimensional accuracy looks spot-on, but I was frustrated to find an unexpected hitch. The cockpit. I thought initially that Hasegawa’s design solution of building up the cockpit from several parts as a subassembly to be mounted through the wing gap was a rather good idea, and it should have worked well, but…  


 First of all, the instrument panel is a different shape to the fuselage contour into which it is introduced, smaller, so it’s not simply a case of reshaping it with a bit of file work. This is a blunder I would not have expected of Hasegawa. Second, there is no positive location device for the panel either, so you’d be trying to tack it in place and keep your fingers crossed that it stays there. Third, the cockpit tub, though it assembles as a box structure, is not so accurately molded as to remove the tendency for the left wall to toe-in, so that the upper edge overhangs the cockpit sill. Fourth, there is no solid ledge against which the tub can be seated, so you’re supergluing it at its contact points and hoping for the best.

Hoping for the best? This is Hasegawa we’re talking about! The big guy, the one who makes Fujimi look second-rate! My solution was to glue the instrument panel to the cockpit walls and reinforce the joint with some scrap styrene, then use angle stock to reinforce the mounting surfaces behind the seat and some rod alongside the edges (below). With this lot it will hopefully stand up to the amount of handling to come without the panel becoming detached and disappearing forever inside. This was after a silly amount of fiddling, pulling apart and re-gluing, and the panel falling off and trying to vanish under my desk three times: not the experience I expect from this company.  


And not the experience I had with Tamiya. It’s been pondered why Tamiya have not yet expanded their 1:48th scale range to embrace the multitudinous possibilities of the Bf 109 F, G and K series aircraft, and the standard answer must be that Hasegawa have that market sewn up, with Hobbycraft taking up the slack for the cheap end of the field. ICM’s F-series planes are also very good, and strong contenders in the same race. But after my experience with the cockpit of this model I am dismayed to see that Hasegawa have used this device as standard engineering, certainly on their other Bf 109s, and the fact is that if Tamiya was to offer me brand new tooling of these subjects, engineered the way their other planes are, I would buy them in preference ever after. With Invisi-Clear decals such a kit would build as a stunner right out of the box.

So I find myself now doubly cautious about the asking price of models these days: Hasegawa’s K-4 is nearly Aus$40 on the shelf here, and that’s a lot of wedge for the firm to fall down on the details. I’m not asking companies to be perfect in every aspect, I have no doubt that this will be a superb subject in my display case when it’s finished, but I do look for sensible engineering where strength and fit are crucial. For instance the keyed alignment of the landing gear struts in Hasegawa’s 1:48th scale P-51D – a marvellous bit of planning and forethought. Maybe divinity really is in the details, and if so the race for sainthood will never be over: let’s just say, this cockpit fubar has delayed Hasegawa’s beatification slightly!

Saturday, May 24, 2014

Building to a Theme


I’m sure I must have posted on this idea before, but sometimes you find yourself building to a theme. I found myself doing so earlier in the year, turning out a Hasegawa Bf 109 F in a North Africa scheme, then remembering that I had Gleed’s Spitfire V, also by Hasegawa, in common scale, on the shelf too and begging to be opened and finished from the mid-construction stage at which I’d left it, oh, a long time go.

No modeller worth his salt can ignore the siren song of such a notion, and before I knew it I was reassessing the older project, and imagining the two warbirds of the ’42-’43 period, contemporaries in the Mediterranean Theatre, displayed together. I doubt the pilots, Werner Shroer and Ian R. Gleed, ever met in action, but they were in-theatre in the last six months or so of the campaign before the collapse of the Axis endeavour on the continent of Africa in May 1943. It seemed just the right thing to do to build a second aircraft to compliment the first – place it in context, if you will.


The models themselves are superb, as you expect from one of the big guys from Shizuoka City, though the Messerschmitt’s tooling design calls for separate engine panels, presumably to allow for the production of change-out parts to cater to other sub-marks, and this allowed for some warpage of the forward fuselage and a lot of elbow-grease to correct the resulting inaccuracies of alignment. From the firewall back the parts matched up as perfectly as you could wish for, so it was likely simple warpage of the parts after demoulding that was to blame.

The Spitfire assembled beautifully, with only the characteristic fine mismatch on the underside at the rear of the wing subassembly to fill and sand, which seems endemic to all Spitfires the way intake seams are endemic to Phantoms, regardless of manufacturer. Other than these points, building was smooth and a pleasure, and I mixed the colours for both from Tamiya Acrylics, applied kit decals (the ones in the 109 were a special edition by Aeromaster) and used Microscale chemistry for decal set and cleaercoats. The roundels under the wings of the Spit were required to conform to various bumps and dips and took many applications of setting solution, plus attention with a blade, to lie down as well as they did, which is acceptable but not perfect. Flory (Promodeller) panel washes and MiG pigments finished the process for each, and I had my first foray into the African phase of WWII.


I like building to a theme. I have a Tamiya Jagdpangther under way, to be finished in the markings of the Ardennes offensive period/area, to compliment the King Tiger I finished six months ago, and have a Pz. IV for North Africa also underway. In a way, building to a theme allows more comprehensive justice to be done, reflecting one’s interests and the depth of research that is done, leading us on to new and fascinating projects.

Of course, themes can get out of hand… I have nine German single seat fighters underway at once, and am aiming to finish a bunch of them production line fashion, and there is something to be said for learning the requirements of certain periods and amassing the materials to do justice to them, but one’s collection shows the dearth of attention outside the theme – and begs for another theme to be addressed. What about US naval aviation? What about the British FAA? What about those vinyl sci fi figure kits? Perhaps things go in waves of interest, and that could also be a good thing. I can’t wait to get stuck into those magnificent 1:20th scale vinyl dinosaurs… One day!


Saturday, October 1, 2011

Simplifying Soft Masking


Back when I started this blog, one of my most-viewed early posts was about detailing Hasegawa’s Bf 109 K-4, and one of the techniques I explored was soft-masking, cutting card masks for the camouflage and applying them clear of the surface by an eighth of an inch to hopefully create soft-edged demarcations.

I have been putting together Hasegawa’s Bf 109 F-2 in markings for Operation Barbarossa, and when coming to soft-mask the camo this time an interesting twist struck me.

I had not particularly thought about the masking until I got to the relevant stage, then I compared the pattern on the K-4 to the one on Werner Molders’ aircraft to see if the same masks would serve, at least for the wings and tail, but the pattern, being hand-applied on the original aircraft, was different enough to warrant a new set of masks being cut.

Rather than a process of trial and error, holding pieces of card to the model and trimming them until they looked about right, and in the absence of a 1:48th scale reference drawing, I pulled another unbuilt 109 from my stash and laid the wing, tail and fuselage parts onto a sheet of light card, ran a pencil around them and abruptly had my profile plans. From that point it was an easy matter to copy the camouflage from the kit plans onto the sketch and outline the segments to be cut out. It doesn’t even have to be very exact.

The virtue is that you can pre-design cutaways to fit around the wings or to run under the tail surfaces, or long tapers to shield the sides of the fuselage, helping reduce tape usage. And, if you’re careful with the cutting out, you’ll have a negative mask as well, which you can lay over the opposite tonal area to touch up overspray if needed.

On this model I’m using Model Master Acryl paints (well, on three models simultaneously, in fact), so look for a review of these paints in the near future.

My too-full schedule has been cleared somewhat lately, so look for new posts rather more often.

Sunday, November 28, 2010

War Stories


The modelling hobby loves militaria. Planes, tanks, ships, artillery, it's like the modern day hand down of toy soldiers in the days when war games were played on back lawns. Okay, that's an oversimplification, and we build our chosen thematic material for many different reasons. A love of aviation, memories of service life, tribute to those who have served, a fascination with a time or place... I tend to look on the military equipment I model as elements of history, both the social and political history of the world and the history of technology itself. Also, the subjects we model, if they are true to life and have any accuracy at all, have stories behind them, or real human lives and dangers, not just of glue and paint.

During a recent group build on the FineScale Modeler forums, three aircraft were presented by one builder, including a brief backstory for each – the historical reality of the subject matter. That crystalised the concept for me, that each and every model we build has its story. Every time someone completes a model of the Bismark or Hood, they are retelling the terrible hours in the Davis Strait when those ships duelled. When we put the finishing touches to a favourite aircraft type in the markings of an ace, we are remembering the exploits of that pilot. The same with tanks, whatever markings you settle on, for whatever reason, whether aesthetic or due to historical research beforehand, we are recalling the actions of that vehicle and its crew, valorous, victorious or otherwise.

I was struck by the degree to which the vast range of subject matter presented to modellers today is a catalogue of the ephemeral: the markings this aircraft wore for that six week period, the equipment fit that tank carried during that particular action, the camouflage scheme experimented with on ships during those months of that year... And there is the personal record.

I'm a big fan of the Bf 109 and have collected a great many decal sheets detailing the history of the type in the various theatres of World War II, and while there are markings for victorious aces who survived the war (Galland, Hartmann, etc.) there are many schemes belonging to aircraft that went down and pilots who did not survive. This became very clear when I read through the notes accompanying Eagle Strike sheet #48078, Jagdwaffe over the Sahara, a collection of Bf 109 F-4 decals. Every one of the five aircraft depicted on the sheet was lost (that in itself is not ultimately surprising), and at least three of the pilots died, possibly all five, it was not absolutely clear from the information given. It's this latter that strikes a chord. The lives that were bound up with the machines, invested in the necessity of the moment, the imperatives of the politics of the age, and which went the way of millions.

If one builds a model of the Arizona, one is remembering the dreadful death-toll in her torpedoed hull. The same with the Yamato, as well as the courageous actions that preceded the coming of the end. Tiger tanks are ever-popular, but by 1944 they were not the invincible rolling fortresses they had been, and crews died by the bushel. To build a diorama of vehicles marked for units at the Battle of Kursk, whether German or Russian, is to recall, with hopefully a due sombreness, what is by many criteria the largest and perhaps the most terrible set-piece battle in human history.

So when critics of the hobby point with a certain negativity to its fascination with military subjects, rather than with the branches that build, cars, trucks, trains and airliners, I reply thoughtfully that the hobby celebrates courage and maps the course of technological development, while also serving as a reminder of the past, which is, of course, one of the best ways to escape reliving it.

Monday, August 10, 2009

Final Review: 1:48 Hasegawa Bf 109 K-4


 With the K-4 finally done (okay, maybe there are one or two details I missed – I blush, I forgot the wingtip formation lights, so she’ll be coming out of the display case for a quick spot of red and green…) I can finish my work in progress articles with a roundup of this kit’s qualities. Hasegawa’s kit #09063 (JT63) is quite the gem. It has many unused parts from other variants, different cockpit sidewalls, the droptanks and underwing gunpods of G-series bomber-destroyers, three different tail wheel struts, three different instrument panels. You need to keep a careful eye on the instructions to make sure you select the right parts for the variant you’re building.  


 Marking options are supplied for two aircraft, Yellow 4, “Ingeborg,” of II/JG 3, March 1945, and a second contemporary airframe. Markings include a full suite of stencil data, even including the Werk numbers which may or may not have been carried on the tail of Yellow 4, depending on the sources you consult. I was originally a little put out with the engineering of the cockpit, but from that point onward the model literally fell together. The propeller attachment could have been smarter, trying to accurately align the fuselage halves while trapping an un-glued rotation piece in a channel at the front end was quite impossible for my dexterity and I settled for gluing it in place as a fixed stub, thus creating a non-turning finished prop. Parts alignment was superb for the most part, my only criticism is a tiny fore-and-aft mismatch on fuselage right and left detailing, which is only really visible where the aft fuselage segments are delineated on the underside. The flaps were marred by a long sink mark on the upper surfaces, which was only visible in certain lighting, virtually guaranteeing the parts were mounted before the problem was noticed. Similarly, the leading edge slats can be mounted open or closed, and while the deployed configuration adds visual interest the separate parts come with the usual penalty for assembling them closed: they don’t fit as well into their bays as the slats of the real plane would.  


 But these are minor quibbles, really. The surface detailing is accurate for a K-4, the hatches and access panels are in the right places, the Erla Haube looks convincing, and with a few extra details scratched together (the radiator pitch rods, battery bay hatch and flap ribs which I covered in my first post on this kit) it builds into a visually convincing model. I could have added hydraulic lines from fine wire but I was out of time and application on the project, that’s something for future builds. Another detail which I had meant to use was Quickboost’s exhausts, beautifully cast with open throats and midline weld seams, however they did not provide the locator slot for the glare shields of the late-series 109s, molded as separate kit parts, and I didn’t fancy scratching this detail at so late a stage. The resin AMs ended up in the drawer against a future build.  


 The decals went down actually quite nicely, reacting well with Microscale chemistry, though the spiralschnauze tried to curl up on the paper and was broken into pieces to be applied, and the big open crosses silvered somewhat. The 60 or so decals make a visually ‘busy’ aircraft, even if the real “Ingeborg” may not have carried a full suite of stencils (references and reconstructions do not, as you would expect, always agree.) Promodeller panel wash and MiG pigments created the worn appearance, the carbon stains and dust that denote a service aircraft being hard-flown, and EZ Line provided the radio antenna. Without going to the extent of AM cockpit and wheels, opening the canopy etc, this model makes a sweet display piece that really captures, the gutsy, brutish yet still graceful lines of the ever-more powerful ultimate Messerschmitt 109. I would recommend this kit to anyone with a few builds under his or her belt: while the multi-tone camouflage will be a challenge and the many decals will certainly occupy more than a couple of evenings, the basic soundness of the kit engineering will foster an attractive finished product if approached with care, forethought, and above all, patience. 


Friday, July 31, 2009

Hasegawa Bf 109 K-4: Soft-Masking the Camouflage


The Hasegawa K-4 has certainly been gestating a long time, what with professional commitments and a month’s jury service, but she’s on the last lap now. I just completed the paintwork and for the first time I’ve tried the technique of soft-masking.

The late-war German camouflage patterns were a simplified, time-saving exercise. Gone were the masked, hard-edge patterns from the early war years, replaced with free-handed patterns on the horizontal surfaces and ever more complex freehand disruptive schemes on the fuselage sides. The challenge here is to reproduce that scheme with smooth graduations between the colours at a resolution which is a fair scale representation of the feather of the original sprayguns. There are many approaches, and while you can change down to a fineline tip and needle on your airbrush, and adjust the thinning ratio of the paint and the pressure delivery to the AB, these techniques take a lot of mastering. Soft-masking leaves the paint operation alone and addresses the problem directly on the model.

The idea is to mask the camo but support the masks clear of the surface by around an eighth of an inch, so that the cloud of paint passing the edge lands on the surface in a tight but still diffuse edge, creating a resolution often difficult by regular means. The first step is to prepare the paint scheme: 


 I sprayed the underside LM 76 first, and when that was thoroughly dry I masked the edges of the flying surfaces, including the wavy-edge demarcation at the leading edge, using Tamiya tape. The card masks are photographed with the model at this stage.  


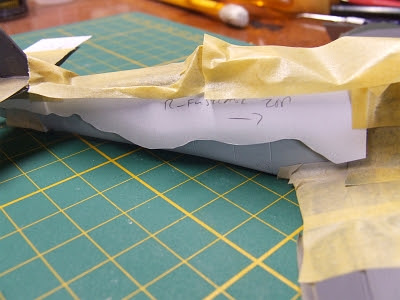
I masked the sides of the fuselage to protect the 76 and the RLM 75 grey topside colour was then sprayed on the horizontal surfaces and left to harden. Then I cut rectangles from white 120-gsm cardstock large enough to cover each area of the grey to be protected. The card pieces were laid onto the wings and tail, fuselage and nose, and the shape was roughly drawn on in pencil, then cut out with small scissors. At this point it's worth noting that Hasegawa "kicked" the grey/green pattern on the left wing: reverse them, grey areas for green areas, to get the historically correct pattern. I kept the positive and negative area masks for the fuselage sides as I was pretty sure I would need both. 


 Above: The card masks were attached loosely to the model with rolled out strips of blu-tac (the same stuff as you use to put up posters) and then extra bits of tape were used to link them together where necessary. With the fuselage sides masked I went on to spray the 75 on the upper parts:  


The three masks crossing the fuselage crest were made on the fly, matching with the horizontal masks already in place:  


Lastly the RLM 83 green was sprayed overall, and when dry the masks were carefully removed. 


The blu-tac develops considerable grab, so it’s important to remove it carefully. The mask crossing the canopy was so firmly attached that it pulled the canopy right off, so it will be reattached in the final round of work. A soft eraser removes some slight residue remaining on the paint. From this point I touched up as necessary, including applying the negative masks to protect the camo on the upper parts of the fuselage, so I could touch up over some overspray darkening the 76, 


then I removed those masks once more, revealing the virtually complete paintjob:  


The definition between the colours could have been softer, I thought, to be more clearly soft-masked rather than hard-masked, but overall I’m very pleased with the result. While labour-intensive, it was a lot less traumatic than trying for fineline airbrush effects can often be. Now, onto the small details and the decals!

Monday, June 15, 2009

WIP: Hasegawa Bf 109 K-4: Tweaking the Details

I recently blogged about my disgruntlement with the cockpit design and fit of Hasegawa’s Bf 109s, and I might have given something of a negative view of the K-4 kit at that time. The fact is it’s a very good model, with almost all of it’s bits in the right place, and there are very few things to correct. It’s more a case of adding what the company left out, either for reasons of economy or the limitations of molding.  


 For instance, the jacks that actuate the flaps of the three radiator scoops are missing, and are always visible on the real aircraft, so deserve to be added. A few milimeters of .020” micro-rod fixes the problem. The wing rads simply had slivers of rod glued in before the wing was closed, while the chin scoop and the target point on the midline were drilled through and a small piece of rod superglued in after the scoop was attached. The end was then trimmed and filed smooth, and the job was done.  


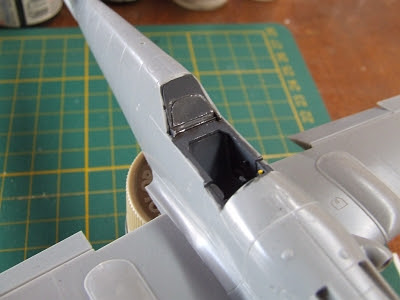
 And there’s the area behind the headrest. This is the only area where detail is explicitly incorrect for the K-4, as a square bulge molded into the fuselage halves represents the battery cover of the G-10 version, while in the later mark the battery was relocated so as not to intrude into the cockpit. Ideally this area should have been a separate detail part with simply a locator hole on the fuselage midline joint, then the differing detail could have been accurately captured with alternate parts to peg into it. No attempt was made to depict the battery access hatch and canopy locking bar found in this area, and the kit is without a seat harness. I scratchbuilt the missing details from .010” sheet, .020” x .040” strip and .020” rod, below:  


Does this count as correcting the kit, or simply beefing up the detail? The latter, I feel, as the kit is almost entirely correct in everything it offers, it just doesn’t offer everything, and in this scale few companies do. I’m certainly not a detailaholic, I’m not creating a pilot’s oxygen hose from guitar string, or installing a resin cockpit with film-and-PE instruments. I get my biggest thrill from the painting and decal stage, and want to get to it sooner rather than later.

Here’s the extra detail painted and weathered with oil wash and enamel drybrushing to dirty it up enough to look used through the clear parts:  


What else is there to do for this one? Many would go to town on the gear bays, they are a bit spartan, but I think I’ll restrict myself to taking a crack at hydraulic lines made from thin detailing wire. Next step – research, if this plane had them, what did they look like?

I’ve no doubt this kit will be spectacular when finished, and that I’ll add another (or two) to my stash one day. Maybe I should complain less and enjoy the process of building more!

Thursday, May 21, 2009

Product Review: Promodeller Weathering Wash. The Future of Wash Detailing?


Panel washes have always been a complicated question: you need a liquid with a low surface tension that will flow into minute recesses, carrying a pigment to contrast against underlying paint. The chemistry must be complimentary: how often have you heard a modeller bemoan the latest panel wash formula to have ruined the paintjob? You can spray acrylics and wash with enamels, and vice versa, you can use barrier clearcoats before and after wash application, and between decal applications, the variations are considerable, from the simplest to the most complex. If, like me, you like to keep finishing operations as simple as possible, reducing the possibility of something going wrong and ruining your work, then the still-new Weathering Washes made by English firm Promodeller come as a true gift. These solutions are clay-based, a very finely-ground pigment suspended in water with a small amount of detergent added to reduce surface tension and allow the pigments to flow naturally. Think of the way sanded filler debris collects in recessed panel lines, perfectly outlining them -- that’s the principle on which these washes work, and they work perfectly. Brush them on, either overall with a broad brush, or selectively with a pointed brush, allow to dry, then simply wipe away the excess. On a gloss finish, a dry paper towel is all it takes to remove the excess, leaving the recesses perfectly accented. As finishes grow duller, a softer cloth or paper with a little moisture is needed. On flat finishes you can swab the surface with a moistened Q-tip, rolling it against the direction of motion to lift the dried clay, but be warned, you won’t remove it all from the microscopic roughness of a flat finish. The effect this creates, however, is visually almost identical to post-shading, so it’s not necessarily a bad thing! A little practice and you’ll find the technique that’s best for you.


 The important thing to remember is, the clay is readily resoluble, so if you develop an effect you don’t like, it’ll wash away from all but a fully flat finish, no arguments. And clearcoats are really up to your personal taste: The Tamiya Bf 109 E-3 on which I first used the wash has none, simply the satin lustre of the RLM paints, and the wash seems very permanent, after months there is no change in its appearance. (These photos were taken before powder pigment weathering and the rigging of an antenna wire).  


 Promodeller sell four shades at the moment, Dark Dirt, Light Dirt, Black and Brown. They come in 50mL plastic bottles which will last a long time -- I’m confident I’ll accent dozens of models, both aircraft and armour, from a single purchase. You can check them out at http://www.promodeller.com and view a 20-minute instructional video online, extracted from their much-longer DVD presentation. I bought mine from Lucky Model in Hong Kong, one of the biggest mailorder firms in the Asia-Pacific region, http://www.luckymodel.com/


 Accenting panel lines, bolt and rivet detail, tight corners and divisions of any sort has, in my humble opinion, never been easier. That doesn’t mean I don’t still use oils suspended in enamel thinner for the capillary-action technique, but that method never was the right one for major panel lines. Now I can brush on the mineral wash and have the main panel divisions of an aircraft done in one sitting.