Friday, July 31, 2009

Hasegawa Bf 109 K-4: Soft-Masking the Camouflage


The Hasegawa K-4 has certainly been gestating a long time, what with professional commitments and a month’s jury service, but she’s on the last lap now. I just completed the paintwork and for the first time I’ve tried the technique of soft-masking.

The late-war German camouflage patterns were a simplified, time-saving exercise. Gone were the masked, hard-edge patterns from the early war years, replaced with free-handed patterns on the horizontal surfaces and ever more complex freehand disruptive schemes on the fuselage sides. The challenge here is to reproduce that scheme with smooth graduations between the colours at a resolution which is a fair scale representation of the feather of the original sprayguns. There are many approaches, and while you can change down to a fineline tip and needle on your airbrush, and adjust the thinning ratio of the paint and the pressure delivery to the AB, these techniques take a lot of mastering. Soft-masking leaves the paint operation alone and addresses the problem directly on the model.

The idea is to mask the camo but support the masks clear of the surface by around an eighth of an inch, so that the cloud of paint passing the edge lands on the surface in a tight but still diffuse edge, creating a resolution often difficult by regular means. The first step is to prepare the paint scheme: 


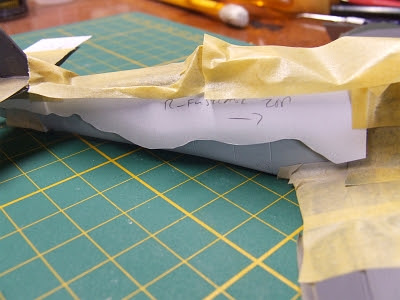
 I sprayed the underside LM 76 first, and when that was thoroughly dry I masked the edges of the flying surfaces, including the wavy-edge demarcation at the leading edge, using Tamiya tape. The card masks are photographed with the model at this stage.  


I masked the sides of the fuselage to protect the 76 and the RLM 75 grey topside colour was then sprayed on the horizontal surfaces and left to harden. Then I cut rectangles from white 120-gsm cardstock large enough to cover each area of the grey to be protected. The card pieces were laid onto the wings and tail, fuselage and nose, and the shape was roughly drawn on in pencil, then cut out with small scissors. At this point it's worth noting that Hasegawa "kicked" the grey/green pattern on the left wing: reverse them, grey areas for green areas, to get the historically correct pattern. I kept the positive and negative area masks for the fuselage sides as I was pretty sure I would need both. 


 Above: The card masks were attached loosely to the model with rolled out strips of blu-tac (the same stuff as you use to put up posters) and then extra bits of tape were used to link them together where necessary. With the fuselage sides masked I went on to spray the 75 on the upper parts:  


The three masks crossing the fuselage crest were made on the fly, matching with the horizontal masks already in place:  


Lastly the RLM 83 green was sprayed overall, and when dry the masks were carefully removed. 


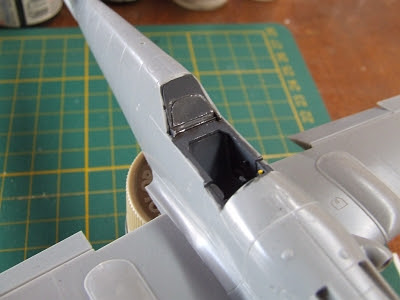
The blu-tac develops considerable grab, so it’s important to remove it carefully. The mask crossing the canopy was so firmly attached that it pulled the canopy right off, so it will be reattached in the final round of work. A soft eraser removes some slight residue remaining on the paint. From this point I touched up as necessary, including applying the negative masks to protect the camo on the upper parts of the fuselage, so I could touch up over some overspray darkening the 76, 


then I removed those masks once more, revealing the virtually complete paintjob:  


The definition between the colours could have been softer, I thought, to be more clearly soft-masked rather than hard-masked, but overall I’m very pleased with the result. While labour-intensive, it was a lot less traumatic than trying for fineline airbrush effects can often be. Now, onto the small details and the decals!

Thursday, July 23, 2009

Warning — Rant: After-Market Parts and the Cynicism of Gilding the Lilly


 I have Revell’s classic 1:48th scale Grumman Cougar on the shelf. It’s the only time that this subject has been done in this scale. The copyright of the edition is 1985 but the kit engineering is a good twenty years earlier. It has raised surface detail, including the so-popular rivets of the time, not much going on inside the intakes, and a single piece cockpit insert combining pilot, seat, floor, panel and detail behind the seat (which, to be fair, is more than many got in those days). It ohh-soo needs a resin cockpit, and resin wheel well inserts, and some of those Seamless Suckers to back the intakes, not to mention weighted tires and maybe a crystal clear vacform hood that can be posed open, a set of vinyl masks, and of course a wide selection of marking options released by the decal guys.

Where are they?

There’s an echoing void. I can sand back the detail and rescribe the bird, sure, and I could use Panther accessories (assuming they’ve been produced for the newer Trumpeter Panther), and piece together my markings from generic sheets, masks and careful paintwork. Yes, that’s a valid approach, and nothing a modeller wouldn’t have to do if the AM industry was less active than it is. My point is just that: the AM industry is volatile in its ability to churn out product, but the choice of product and how it is marketed seem to play—cynically—only to certain parts of the hobby. 


 The pics above are the collection of AMs I put together for a single project. I know what you’re thinking – for a bloke who complains about AMs, I seem to have a lot of them. And I’m not really complaining, just having a bit of a whinge… I mean, where would we be without companies like Eduard, Legends, Verlinden, Mig Productions, Coree and the like? It could be said Francios Verlinden started the AM industry thirty years ago, giving modellers things they really wanted (to make up for the shortfalls in commercial kits between affordable practicality and actual accuracy). That was a great thing, and transformed the hobby, allowing more modellers to build truly spectacular models without needing to evolve the skills of a master machinist with infinite time and resources to do so.

The market proved to be an accommodating one, and the quality race was on: the kit companies raised their own game, in one generation injection molded plastic has gone from often clunky to often breathtaking, and the resin and photoetch guys have kept pace, not simply providing alternatives but striving to correct and outdo their plastic counterparts.

Yet there comes a point when this process becomes cynical.

 Tasca burst on the injection mold scene in 2003 with a Panzer II in 1:35th scale, and reviewers ran out of superlatives... Not just accuracy of outline and a high parts count, with individual molding of detail parts for maximum accuracy and realism, but a fineness of detail resolution never seen before (and probably nowhere else even now), such as butterfly bolts (wingnuts) rendered in actual, crisp detail though the parts were less than 1mm in size. The model featured working plastic torsion bar suspension, something done elsewhere since (AFV Club’s Tiger I, IIRC, featured the same), but which at the time was a jaw-dropper. Surely no finer or more ambitious plastic engineering had ever been attempted, and what more could a modeller ask for? Especially at the comparably high price the kit commanded (and still does).

Well, after-markets. You have to have a photoetched detail set to make it better... Or so say the guys who make them, and have the gall to offer an expensive fret of etched metal because the reviewers who raved about the kit were obviously wrong to praise it so highly. Hey, scrape away that incredible styrene molding, stick on some of our metal, then it’ll really be accurate!


 You see the same thing with aircraft. The finest kits are the ones for which ‘updates’ are offered, or corrections, kits which already feature some of the best components on the market and build into pretty darn good models just as they are, while older, or more affordable, kits that could really do with a helping hand, are pretty much ignored. True Details produced a host of fine parts for a wide variety of subjects many years ago, but their productivity has been much lower in recent times, and that could be symptomatic of the same thing: the marketplace that must have its AMs doesn’t buy cheapy kits and oldies to start with, and we can expect the AM companies to have done painstaking market research to properly target their products. 


It is as it is. If you want to make an expensive kit even more expensive then they’re ready and willing to take your money -- that’s the nature of a commercial enterprise. And it’s true that there are modern kits which do indeed fall down on the job: Trumpeter’s new 1:32nd scale Grumman Bearcat faired pretty well in it’s review in the pages of FineScale Modeler, but others were not so kind to it, one English magazine’s build-up feature laid bare the bones of that particular skeleton and after that I lost my enthusiasm for scraping together the asking price. Maybe with a comprehensive AM set to fix the problems it might be worth the effort, if such a set could correct the engineering deficiencies of, for instance, the wingfolds (perfect if depicting them folded, but the fit is hopeless for the extended configuration, which is, after all, the most likely form in which most buyers would choose to depict the aircraft).

I guess the point I’m making is simply this: while I acknowledge that the top end of the market is a legitimate place to play to, it would be nice if the AM guys aimed a bit lower at times too. Not necessarily that old Cougar, she’s a rarity these days, of course she is (to tell the truth it’s an awful kit by modern standards, and in the cold light of day I don’t think it’s actually worth saving!), and any product must have a big enough potential market to justify its existence. But bits and pieces to trick out kits that actually need it would be nice. (And yes, Eduard and others have gone round and diligently produced PE sets for, e.g., thirty-year old Tamiya armour, which blunts my argument somewhat, even if the sets are often more expensive than prices at which you can pick up the kits!)

But I like the Quickboost approach best: replacement parts for an ever-growing range of items, with superior detail at an affordable price, and so light-weight they mail for free from many companies... Yeah, now there’s my idea of an AM outfit!

Rant over, normal services will be resumed as of the next post!

Tuesday, July 14, 2009

Why do so many companies have trouble with tracks?


Tracks... All armoured vehicles over a certain weight have them. They come in endless styles, narrow ones, broad ones, cleated tracks, padded tracks, live track, dead track... Amtracks with ‘swimming grousers,’ Shermans with ‘snow grousers,’ Panzers with Ostketten. The fascination with modelling tanks brought with it the challenge of companies producing realistic tracks, and most modellers would say they’ve never really achieved 100% accuracy no matter what approach they’ve taken.

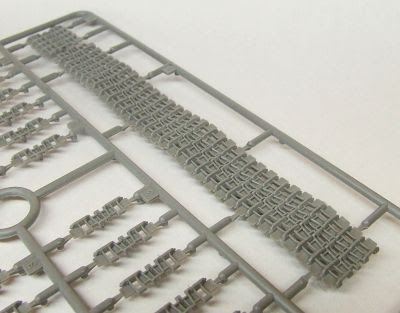
There are traditional flexible vinyl tracks, single-piece, to be joined around the running gear, and they do a generally good job. In the early 1970s they tended to be poorly detailed and possibly undetailed on one side, though today molding technology and computerised machining of the molds means they can be highly detailed both sides. The ones above are from Tamiya’s 1:35th scale King Tiger, Ardennes. The drawback is that the relative stiffness of the vinyl means the tracks don’t develop a sag between the return rollers, or lie along the top of large diameter wheels, like real tracks do. 


 Then there are individual-link or link-and-length tracks, which call for cleanup and assembly. For some modellers these are the best, though for others they are a nightmare whose tedious nature more than forgives the lack of sag in the vinyls. Above are the indie links made by Academy to compliment their issue of the early Tamiya Panzer IV-derived tanks (all the models on the box are of Tamiya origin). And below are ModelKasten’s set for the above-mentioned King Tiger. 


If sag is your thing, Trumpeter got ambitious a few years ago and produced superbly machined link-and-length tracks for their KV-1 series of kits in which the sag over the return rollers was molded right in, and even the most die-hard anti-L&L builder must feel tempted by these amazing pieces of injection work:  


Then come the workable tracks from AM companies, whitemetal, plastic or resin with wire pivots taking the place of the real track bolts, and which will hang, sag and roll like real (dead) track -- for a price.  


Dragon came up with Magic Tracks, a soft styrene type in which the links click-fit and will hold their shape until you can hit them with liquid cement, lending themselves to being shaped to any configuration of suspension. This is a neat idea and probably the most innovative. Vehicles with skirts tend to make that perfect hang and sag of the return length superfluous though: you can’t see it, so why sweat blood on it? And tight tracks don’t sag anyway. But tightness raises the question of why some companies don’t seem to be able to get it right in the most profound sense. 


I’m talking about early Trumpeter. I was really attracted to the Chinese Type 89 tank Destroyer, and was building along quite satisfactorily -- until I came to the tracks. They were half an inch too short (below) to link up around the running gear, and no amount of coaxing was going to change that: snapping off the portside idler wheel convinced me to give up. I tried heat treatment, stretching them by heating them with a hair drier, and hanging them with weights, but after half a dozen exhaustive treatments, using all the heat my hands could tolerate, one track had grown about one link’s worth, as the vinyl shrank again upon cooling. I was fed up and shelved the project. That late-mold Tamiya StuG III I reviewed last time was both a pleasure and a relief to build instead.


 Of course I didn’t give up entirely. The Type 89 shares the same chassis with the 122mm MBRL and the Type 83 SP artillery, I have them all, and all I would need is a single extra length of track to complete them. Cut out a few links and splice them in with superglue and thread as necessary, and suddenly the tracks will go round the running gear and meet as they should. I emailed Trumpeter, seeking to buy a spare length of track, got a reply asking me to forward photographs of the parts involved... Then nothing. Hey, I tried, but their aftermarket support at this point is as dodgy as their English, which is curious given their truly ambitious products and their dedicated assault on the affluent end of the Western marketplace. Their more modern products are of higher quality, I would certainly hope the tracks are the right length given the price they charge for their new armour.

And what about Dragon? That other Chinese company often considered to have eclipsed Tamiya as king of 1:35th scale? Early Dragon is beset by far too many microscopic parts which vanish into the carpet, and by the sort of over-thought engineering that has Dragon airplane models glide into waist bins beside the benches of grown modellers sobbing with frustration at their sheer unfriendliness and inaccuracy of fit. This is the antithesis of Tamiya’s philosophy, and while Tamiya’s earlier products may not be acceptably accurate or sufficiently detailed for today’s more mature taste, you can mostly rely on them to build well. “Buildability” was Mr. Tamiya’s watchword, and is sure to have contributed to the company’s historic success.


My only experience with early Dragon is in the reboxing of their classic Russian armour models when the molds were obtained by Zvezda. Their BTR-70 built fine, only a few grab handles needed to be replaced with brass because they broke before I could remove them from the sprue (because the parts were finer than their sprue attachments!) But their T-72 is another matter. It may be Zvezda’s plastic: the link and length tracks are brittle and the plastic really does not like to react with superglue (a bit like Chinese plastic in that respect). Thus trying to piece those tracks together promised to be an exercise in frustration. The Zvezda T-72B with Explosive Reactive Armour is easily the most detailed tank model I have ever built, and it sits unfinished in its box because there is no way I’ll mess around with that job, and the only AM T-72 tracks I can locate are far more expensive than the kit was. My prayer, thrown to the gods of styrene, is that AFV Club will finally produce high quality vinyl replacements in their expanding range of sell-alone tracks.

Which brings me back to my lament, why can’t companies with all the expertise and the million-dollar computer-assisted design and manufacture, get the tracks right? Properly detailed, that fit the sprockets exactly, articulate with each other, and take a realistic paintjob? If it has to be link-and-length, then the plastic had better respond well to glue, you certainly can’t stitch them together. And if they’re vinyl then is it too much to ask that they be the right length?

These criticisms don’t apply to modern Tamiya products, modern Dragon, or, as far as I know, current Trumpeter or Revell-Germany. But they can all be criticised for their sometimes exorbitant prices. I know, I know—I want it all ways, tracks that fit and an affordable price. I’m just out of touch with reality...

Saturday, July 11, 2009

Kit Review: Tamiya StuG III/G


 Tamiya’s retool program began in the 90s with their reworking of the Tiger I Ausf E (35146), rectifying many of the criticisms of their old version (35055). The new generation tooling was more precise, there was better engineering, more options, and greater accuracy and detail fidelity. Many of their early kits were withdrawn by that time, one of which was their Sturmgeschutz III Ausf G. I had no idea there was such a kit until finding a diorama built around it in an early-90s issue of FineScale Modeler. This vehicle is a significant one, at the end of the Second World War it was by far the most numerous armoured vehicle available to the Germans, as the turretless self-propelled assault guns were much quicker and easier to build than actual tanks.

The retool of the StuG (35197) is an excellent piece of plastic engineering. It pretty much fell together, it was possible to finish the suspension and lower hull details in one evening session, build up the gun and mantlet at the same time, and in no time be moving on to the wheels.


 There are plenty of options in this kit. It is supplied with brackets and rails to mount a suite of stand-off armour (included); there are triple smoke grenade launchers for the forward hull to model an Ausf G early production type (they were deleted at the end of 1943 as unneeded); twin radio antenna mounts in case you want to build a command version, which featured extra radio equipment in the starboard side superstructure; the loader’s and commander’s hatches can be posed open, though there is no interior detail and the sponsons are open, a throwback to earlier generations of tooling; the MG-34 shield can be assembled folded down or raised with the gun mounted; an alternate barrel is provided for the 105mm howitzer to build the Sturmhaubitzer 42 variant; and two figures are included, plus a small dog, creating a vignette of a crew in an off-duty moment which is a pleasant reminder of the humanity of the crews who manned these machines of war. The kit provides markings for three vehicles, the 303rd StuG Brigade, Wermacht, Norway, 1943, in overall dark yellow; the 237th StuG Brigade, Wermacht, Russia, 1943, in dark yellow with red-brown disruptive stripes; and a StuH 42, “55” of an unknown unit in Italy, 1944, in overall dark yellow. I used a set of Echelons on mine as I fancied a green mottle camo job.

Tamiya produces a photoetched fret, sold separately, for the engine intakes and exhaust assembly, though a cheaper one is made by Eduard (seen here) and does admirable service, even including a few extra parts.


 There are very few fiddly bits on this model. Locating the ventilator, spare track retainer and radio mast mounts on the rear wall of the superstructure calls for use of a template part, you simply draw around a set of indents to create locator marks, then glue the pieces directly on without guides or pegs: that would have required slide-molding. You need to be aware that the main gun mounts to a pedestal inside the hull with a push-fit, so dry-fitting this part invites a permanent fit before you’re ready.

Beyond this, there is really very little to comment on, other than ease of assembly and alignment, the overall pleasing sit of the vehicle on its tracks (which are vinyl, with full double-sided detailing.) There are plenty of aftermarket options for this kit, from photoetched details, including a general PE set by Eduard, gun parts by CzechMaster, probably full PE stand-off protection by one of the AM companies to replace the too-thick and too-regular plastic parts, a zimmerit set made by Cavalier, decals by Bison, Echelon and others, Panzer III indie tracks by Dragon and replacement tracks for Panzer III series vehicles by ModelKasten and Friulmodelismo. You can indulge your taste for AMs as far as you like, but the basic kit builds a very nice, realistic model. There are tiny details you may wish to change depending on how much of a stickler you are, or how much you want to depict a specific point in the production run, such as fender brackets, and fasteners for the removable armour of the superstructure roof.  


I finished mine in Tamiya acrylics, with oil wash weathering and Echelon decals as a StuG III early, with smoke grenade launchers but without stand-off armour, single antenna mast, and with hatches closed. There are endless other ways to build this kit, and I have two more in my stash. One day I hope to do one in zimmerit, with winter camo and stand-offs.

As a longtime fan of Tamiya I am delighted with their products new and old, and the sheer ease of construction and precision of engineering one encounters is always worth the price of opening the box. Yes, Dragon’s Ausf. III/G is that bit more accurate and consistent in its fine details; it’s that bit more expensive too, and you pay for what you get, as ever. This little kit is easily one of my favourites, and teamed with the Squadron Signal Sturmgeschutz III in Action and Sturmgeschutz III Walk Around volumes, I rapidly became knowledgeable of this historically important vehicle as I was building it. 


Here are some online references for this vehicle:   http://www.primeportal.net/the_battlefield_armor.htm


Wednesday, July 1, 2009

The Very First Kit


Can you remember your first kit? Can you remember where and when it came to you, and what it was that drew you to the hobby in the first place?

I was five years old the first time I saw plastic kits and understood them for what they were. Airfix Series 1 bagged kits, in a window display at the newsagent at the end of my street. I remember my dad taking me to the shop on a Sunday morning and buying me an Airfix Tiger Moth. He built it for me as I watched, rapt, and by the end of the day there was a bright yellow (it was molded in trainer yellow in those days) biplane for me. I was fascinated, and wanted more!

The following week was the same pattern, and the Airfix Bristol Fighter joined the Tiger Moth. And in the weeks after, each Sunday morning brought a new shape in plastic: the Westland Whirlwind was one, the Gloster Gladiator another, and the F-5A was the first jet in the collection, as well as the first kit where I was sufficiently inspired to try my own hand and help out on the building. I think the Me 262 was one of them also.

A child’s nimble brain is way ahead of his or her dexterity in relating the shapes and how they go together, and there is always a lot of frustration in getting from A to B—A being the fresh kit and an idea in mind of what the product should look like, and B being the actual result. But I do remember my family never stinting their praise for my efforts, no matter how far I had to go to perfect the skills involved. As a child I was more interested in quantity than quality, and production-lined models through at an amazing speed, without giving a thought to accuracy or moving beyond the limitations of the kit, but these things developed automatically as the years went by.

I still have a fondness for that so-simple Airfix Tiger Moth, and Roy Cross’s classic box art. I have it in my stash (that's the box top of the current issue above), and one day I’ll do the best job on it I possibly can, including rigging and maybe score out the control surfaces and reposition them. There’s only so much you can do with 25 parts, but as with the generation of RAF pilots who began their flying career in De Havilland’s classic trainer, this aircraft, and this particular kit, will always mean the beginning of the road to me.

Monday, June 22, 2009

Product Review: Microscale Micro Metal Foil Adhesive


South Australia is slightly over the edge of the world. You can’t get stuff here... I inquired at the biggest hobby shop in town about a polishing kit to develop a glass-like shine on gloss enamels and was told that, while they had heard of them, there was no point stocking them, as nobody (presumably besides myself) would ever buy one in this town. Just the same, Model Master Enamels are going out of stock here at mainstream stores, they’re just not popular enough compared with Humbrol Enamels or Tamiya Acrylics, so the biggest shop in town is not going to restock, and they never had the full range anyway. If you need precise matches to historic colours, you’re off to a specialist stockist...

So I actually had a bit of luck lately when I needed Microscale’s Micro Metal Foil Adhesive. It was the right product for the job, and this time it turned out the shop actually did have in stock what I needed. I call it blind luck, as of all Microscale’s wide range of great finishing products, this was the only one they actually stocked (and no, their nearest competitor has never heard of the range...)

Rant aside, this is a good product! It smells like PVA white glue, looks like it, albeit water-thin, but it grips like PVA never did. And it seems to be water-based, as you can clean up with water until it’s cured, and with paint thinner afterward. It dries pretty quickly, a minute or two and it’s off provided you’re only using a small amount. 


 It’s easy to use. Cut a piece of foil, brush the glue onto the back and wait until the ‘milky’ appearance has gone, then apply it to your model. There’s some slippage time, but if you time it just right it’ll grab pretty quick. Applying it firmly over a smooth surface, you can then burnish the foil to a smooth, gleaming finish. In my case, I was applying crumpled gold foil to a Lunar Module to replicate the gold Mylar thermal insulation of the Descent Stage, so a burnished final appearance was not involved. This was just as well, as I found the glue did not hold very well on the small sticking area of tiny, curved surfaces, so my application did not wrap tightly to the struts. In context it created a suitably bulky, ‘packed’ appearance just like the original, but I found you need to work with larger diameters of tubing to get a firm, tight contact between foil and plastic. 


 Nevertheless, I was impressed. As with every Microscale product I’ve tried (with the exception of Trimfilm, but that’s another story), it works as advertised, is very economical and non-messy. This is a recommended product.


As a water-based formula it’s okay to send through the post (like Talon Acrylics), as US airmail won’t touch so many hobby products any more. That’s another post too...

Friday, June 19, 2009

Accuracy, Out of Inaccuracy

Aurora -- the name brings back rosey-eyed memories of many an afternoon spent with glue and paint as a child, not that I could afford many Auroras. I remember a shop that stocked them in the early 1970s, the square-box edition with those imposing paintings, their movie monsters series in particular. I bought their King Kong and was very impressed by that powerful figure. I’ve often wondered what I could do with that kit with my current techniques.
 

 But the Aurora I’m thinking of is somewhat different. It was said by a reviewer that Aurora’s aircraft were always suspect, and the older the kits the more likely they were to be suspicious as to their accuracy and fit. Aurora’s B-58 Bomber (#375) was tooled in 1958, I managed to find an unmade 1958 example (long box) on eBay, for a reasonable price (some parts had been assembled, several were painted, and they were detached from their sprues). I needed it to mold off some parts to build some SF studio replicas -- TV FX miniatures built in the 60s which used B-58 parts from this kit -- and in that much it will suit its purpose perfectly. But the kit itself is a...disaster!

It’s the wrong shape. Not one single part of it is accurate. Not the proportional sizes, not the contours. The engines are way too fat, the tailplane is all over the map, the wings are the wrong size. There are raised decal guides on the surface... How this model could have remained in production for so long is a total amazement. Revell’s and Monogram’s early offerings may not have been up to scratch by modern standards but they were rather better than this. Italeri’s #1142 is by far the best B-58 in the scale, no wonder it fetches the prices it does on eBay these days: maybe Italeri will take notice of this and reissue the kit again, as they did about five (?) years ago.
 

 Here’s a comparison, the Aurora (top) and Italeri (bottom) engines, the latter being accurate and in fact the larger scale!


 And here are the fuselages and tails, Aurora at the top, then Lindberg and Italeri at the bottom. They seem like three different aircraft.


And on the subject of scale -- the classic Aurora is always reputed to be 1:64th, but the stated scale is ‘5/32nd” (to the foot)’, which goes through the calculator thus: 12” x 1/32nd” = 384/32nds, divided by 5 = 76.8th scale. This is almost the same as Lindberg’s (somewhat better) kit, which compared to the real aircraft scales out at 1/78th, and accounts for why the parts are smaller than Italeri’s (which is a -- more accurate -- 1:72). Unless Aurora tooled a larger B-58 (as they tooled a much smaller one at 1:180th, released these days by Addar), I’m mystified at the general air of confusion surrounding this kit.
 

 Incidentally, Lindberg’s has also been deemed 1:64, which it isn’t. The stated scale is 3/16th”=1’, which calculates out at 1/64th okay, but when you measure the components and compare them to the real aircraft, it’s noticeably the smallest of the three.

Will I ever assemble the Aurora Hustler? No. But I’ll use plenty of castings from those components to build entirely accurate replicas of the science fiction craft which used its parts: therein lies actual accuracy, which, ironically, stems from inaccuracy as its basis!

Monday, June 15, 2009

WIP: Hasegawa Bf 109 K-4: Tweaking the Details

I recently blogged about my disgruntlement with the cockpit design and fit of Hasegawa’s Bf 109s, and I might have given something of a negative view of the K-4 kit at that time. The fact is it’s a very good model, with almost all of it’s bits in the right place, and there are very few things to correct. It’s more a case of adding what the company left out, either for reasons of economy or the limitations of molding.  


 For instance, the jacks that actuate the flaps of the three radiator scoops are missing, and are always visible on the real aircraft, so deserve to be added. A few milimeters of .020” micro-rod fixes the problem. The wing rads simply had slivers of rod glued in before the wing was closed, while the chin scoop and the target point on the midline were drilled through and a small piece of rod superglued in after the scoop was attached. The end was then trimmed and filed smooth, and the job was done.  


 And there’s the area behind the headrest. This is the only area where detail is explicitly incorrect for the K-4, as a square bulge molded into the fuselage halves represents the battery cover of the G-10 version, while in the later mark the battery was relocated so as not to intrude into the cockpit. Ideally this area should have been a separate detail part with simply a locator hole on the fuselage midline joint, then the differing detail could have been accurately captured with alternate parts to peg into it. No attempt was made to depict the battery access hatch and canopy locking bar found in this area, and the kit is without a seat harness. I scratchbuilt the missing details from .010” sheet, .020” x .040” strip and .020” rod, below:  


Does this count as correcting the kit, or simply beefing up the detail? The latter, I feel, as the kit is almost entirely correct in everything it offers, it just doesn’t offer everything, and in this scale few companies do. I’m certainly not a detailaholic, I’m not creating a pilot’s oxygen hose from guitar string, or installing a resin cockpit with film-and-PE instruments. I get my biggest thrill from the painting and decal stage, and want to get to it sooner rather than later.

Here’s the extra detail painted and weathered with oil wash and enamel drybrushing to dirty it up enough to look used through the clear parts:  


What else is there to do for this one? Many would go to town on the gear bays, they are a bit spartan, but I think I’ll restrict myself to taking a crack at hydraulic lines made from thin detailing wire. Next step – research, if this plane had them, what did they look like?

I’ve no doubt this kit will be spectacular when finished, and that I’ll add another (or two) to my stash one day. Maybe I should complain less and enjoy the process of building more!

Friday, June 12, 2009

Minute Details: Resin Replacements or Go With the Kit Bits?


 I was working on the Hasegawa 1:48 F-104C and found myself thinking what great engineering it features. So many options, so much detail! The recessed surface detail is incredible, and the five-part wings boggle the mind when you’re used to those thin, thin Starfighter wings having been single-part castings in (probably) every kit before. What really made me stop and think was when I was assembling the 13-part ejector seat. The seat itself fits back against the fixed guide assembly, and until you add glue, it actually slides on the very rails which in the real thing constitute the ramp to guide the rocket projectile (the seat) out of the cockpit. I find myself asking, why would I bother going to the expense of replacing this seat with a single block of molded resin?  


 Sure, I have the Black Box conversion set to modify the kit to Canadian standard, and the resin cockpit is fantastic, with molded in seat and harness and such. The proportions do look rather different when you compare the tubs, and the knee-jerk is to say the resin one must be the accurate one, because, well, it’s an aftermarket resin! (Ever tried stuffing a Verlinden transmission and final drives into a Panzer IV hull? I’ve heard it can reduce a seasoned pro to tears, which suggests either the hull or the AMs are inaccurate: they can’t both be right, or they’d fit.) But unless you’re building an open cockpit to show off all that detail, it does tend to get lost in the gloom. There’s satisfaction in knowing all the details are there, but frustration in spending a long time creating it, only to have it disappear when the project is finished. For a closed cockpit I would most definitely go with the kit parts, and for open ones too under most circumstances. I will certainly be building more Hasegawa Starfighters in the years ahead, the subject is just too appealing to ignore! The kit itself has such a wealth of detail that sometimes resin is ‘gilding the lilley,’ as it were, while older (and more affordable kits) which cry out for a resin helping hand, are almost universally ignored, which doesn’t seem fair... This is a theme for another post.

Monday, June 8, 2009

Product Review: Echelon Decals


 Echelon is one of those small (not so small anymore!) manufacturers with both skill and a real enthusiasm on their side. Based in Singapore, Echelon specialises in armour decals, mining World War II for rare and interesting Allied and Axis schemes, as well as investing considerable effort in documenting the US armour formations of Desert Storm and OIF. They have also created a unique range of reflective adhesive-foil die-cut parts to represent the driving mirrors of peace-time armoured vehicles, a more realistic option than the old silver paint can ever be.

Releases range from small, single-subject sheets, to large sheets with multiple subjects, accompanied by excellent full-colour instructions generated off computer printers. The great news is Echelon is one of those lines that some Asian dealers sell postage-free anywhere in the world, for instance Spearheads Frontier in Singapore (the originating source) and Lucky Model in Hong Kong, who stock the full range.

Featured above are a couple of their more compact offerings: one of their Desert Storm sheets, #356025, an M1A1 named ‘Atlas,’ a typical beast with chevrons and Tact Board, and the classic wolf’s head insignia (slightly puzzling to the casual glance, given that this vehicle belonged to ‘Tiger’ regiment). This is one of their small sheets, about 2” square, with a computer-generated 14 x 8 cm instruction sheet. The other, slightly smaller sheet, is a German WWII subject, a small collection of crosses and insignia for StuG IIIs on the Russian front, #356033, and you’ll note some decals are used.  


I used them last year on a Tamiya StuG III/G (35197) seen above, using markings for the StuG brigade of “Das Reich” at the Kursk Salient in summer 1943. I painted with Tamiya acrylics and the very thin, very strong decals went down perfectly without glosscoating, and with no silvering at all. They are a little glossy, some clear flat before application would help with this. I have a late Panzer IV on my build list for this year and I’ll certainly be using Echelons as their quality of manufacture and depth of research make them an obvious solution.

If you’re after unusual subject choices, manufactured to full professional quality, at competitive prices and even postage-free anywhere in the world, Echelon is fast becoming a range of choice. I certainly have them in my stash!