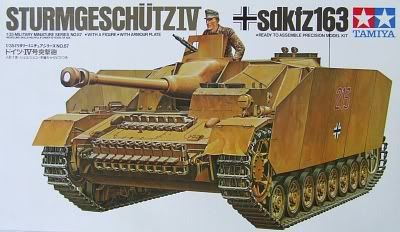
This kit (#35087) has been around for a very long time, thirty years or more, and in general one expects toolings of that age to fall down on the job by comparison to the new stuff. In recent years it was widely speculated that Tamiya were backing out of the 1:35th scale armour game, leaving it to the prolific releases of Dragon and Trumpeter that were making such an onslaught in the marketplace, but among Tamiya’s updatings to get new life from old moulds there have been a series of gems, their T-55, JS-3, Char B-1, Leclerc, and the brand new ISU-152. Tamiya has always been characterised by “buildability first,” catering to the younger or less experienced modeller by engineering their models to build well, something Dragon started to do with their “Smart Kit” range about thirty years after Mr. Tamiya made it policy. So just how do older kits build?

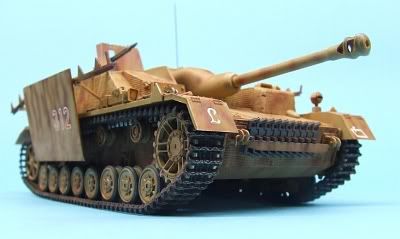
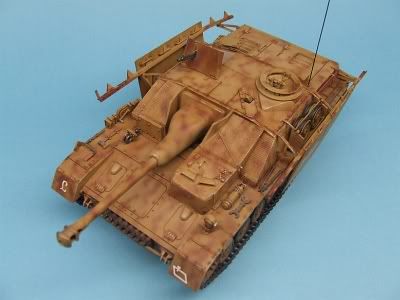
I wanted to do this one for many years. I was inspired by Glen Phillips’ build-up and detailing techniques in the May 1991 FineScale Modeler, and hunted out a StuG IV which I bought from a second hand dealer in Japan, but it was many years before I could get around to it. For one thing, I had to figure out how to make an airbrush spray fine lines, as the rotbraun mottle was far finer than anything I had ever sprayed before, and these skills did not come easily. And there was the matter of Zimmerit, a prepossessing task when it involves plastering putty all over a model and scraping it to make that characteristic ridged pattern.
The second problem was the easier to solve. Cavalier Model Products to the rescue – see my upcoming review of the brilliant Cavalier product for the low down on how to get a superb rippled finish on your German armour, if you’ve not already used this terrific texturing medium.
The first was solved about a year ago when I did some experiments to spray a more convincing, true-to-the-research, disruptive scheme on my Academy Tiger I Early, and I found that I had a formula for getting tight edges and fine demarcations (at last) from my Paasche VL.
Armed with these and other tools (such as the Alliance Model Works photoetched mask set for tank wheel rims, reviewed last time), I built the old StuG and was very pleasantly surprised. The parts fit was excellent throughout, there were no dramas, no fights, except for one track which would not couple. I shaved away the pins and superglued the ends together, problem solved; I’m not sure I even class that as a problem.
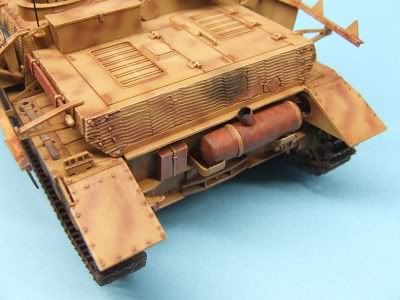
The kit has lots of options: two lengths of spare track to mount in a couple of possible locations; schkurtzen standoff armour and mounting rails, none, one or two radio antennas, moulded concrete frontal slabs for late-serving vehicles, open or closed hatches, a figure, deployed or stowed MG shield, posable scissors-sighting gear, plus a suite of divisional insignia and several sets of vehicle numbers, allowing you to either follow the kit suggestions for final subject vehicles or do your own research and paint it however you like. There’s plenty you can do with this kit to build several and never have two look even substantially similar.
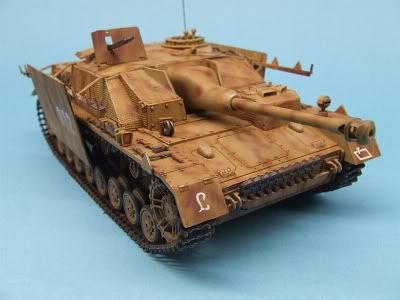
Another thing I like is the fact that all the wheels rotate, with the exception of the return rollers. Some later kits don’t do this, and while link-and-length tracks are of course rigid, and Tamiya engineered their early-era kits in the days when motorisation for “toy appeal” was in, it’s always somewhat cool to see your model’s running gear actually work on a rough surface.
In terms of accuracy, there were a few details that Tamiya missed out, probably due to the limitations of moulding. The kit belongs to the era of open sponsons, and if you’re having any open hatches it’s a good idea to do a bit of scratchbuilding and close the hull to avoid a see-through effect if viewing from above. The standoff plates and rails are overscale, of course, they were in reality 5mm armour plate but if you multiply the kit parts by their stated scale you find they would be more like 30mm or more. There are photoetched replacements for many vehicles out there, plates and racks alike, but I simply sanded mine down on wet’n’dry paper to thin them a little. The plates are cast as single units but they were in reality separate plates along the hull. You can cut the plates from their neighbours to get this effect as an irregularity in the way they hang from the mounts.
The age of some of the components is probably close to forty years, as the lower hull is shared in common with their other Panzer IV kits and Pz. IV-derived subjects (Brumbar, FlakPanzer, Jagdpanzer etc.), the earliest of which were definitely early 1970s releases.
I would have to say this kit, while simple by today’s standards, is remarkably good. It builds a sturdy, appealing product, is a project which early-career modellers can tackle adequately due to the builder-friendly design, and there are quite enough options and room for scratchbuilding to keep experts happy also. There are uncountable numbers of Pz. IV accessories on the market, and many would be appropriate for the StuG, such as damaged roadwheels, better-quality external tools, photoetched fittings, replacement tracks, and decal sets for a wider choice of markings and schemes.
It took quite a lot of methodical work to get it finished, but I can’t say there was a particularly difficult bit anywhere in the project, and I will certainly be building others. My next StuG IV will be minus zimmerit and skirts, and be wearing three-tone ambush camo. In conclusion, I recommend this kit to any modeller: beginners should find it a bit of a challenge but by no means impossible, while styrene experten may find it a refreshing simplification compared to Dragon’s policy of ‘never use one part where five will do.’ As an older kit it’s also cheaper by far than the new-tool products, around half the shelf price, though they change hands often enough on eBay for a fraction of that.


No comments:
Post a Comment