
For instance, the jacks that actuate the flaps of the three radiator scoops are missing, and are always visible on the real aircraft, so deserve to be added. A few milimeters of .020” micro-rod fixes the problem. The wing rads simply had slivers of rod glued in before the wing was closed, while the chin scoop and the target point on the midline were drilled through and a small piece of rod superglued in after the scoop was attached. The end was then trimmed and filed smooth, and the job was done.

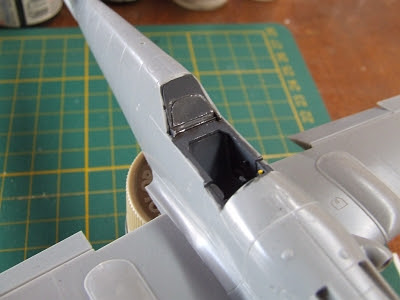
And there’s the area behind the headrest. This is the only area where detail is explicitly incorrect for the K-4, as a square bulge molded into the fuselage halves represents the battery cover of the G-10 version, while in the later mark the battery was relocated so as not to intrude into the cockpit. Ideally this area should have been a separate detail part with simply a locator hole on the fuselage midline joint, then the differing detail could have been accurately captured with alternate parts to peg into it. No attempt was made to depict the battery access hatch and canopy locking bar found in this area, and the kit is without a seat harness. I scratchbuilt the missing details from .010” sheet, .020” x .040” strip and .020” rod, below:

Does this count as correcting the kit, or simply beefing up the detail? The latter, I feel, as the kit is almost entirely correct in everything it offers, it just doesn’t offer everything, and in this scale few companies do. I’m certainly not a detailaholic, I’m not creating a pilot’s oxygen hose from guitar string, or installing a resin cockpit with film-and-PE instruments. I get my biggest thrill from the painting and decal stage, and want to get to it sooner rather than later.
Here’s the extra detail painted and weathered with oil wash and enamel drybrushing to dirty it up enough to look used through the clear parts:
What else is there to do for this one? Many would go to town on the gear bays, they are a bit spartan, but I think I’ll restrict myself to taking a crack at hydraulic lines made from thin detailing wire. Next step – research, if this plane had them, what did they look like?
I’ve no doubt this kit will be spectacular when finished, and that I’ll add another (or two) to my stash one day. Maybe I should complain less and enjoy the process of building more!


No comments:
Post a Comment