Friday, August 28, 2009

Big Models for the Big Boys


 No, I don’t mean radio control. I don’t mean those two-stroke motors that seem to be revving at ear-splitting volume in hobby shops every time you go in to find that bottle of paint you need, and I don’t mean the endless shock absorbers, steering gear and offroad tyres that seem to take forever for shop staff to sort out for the people permanently in line ahead, hogging the counter... I’ve nothing against RC, really -- but that’s another post!

No, I mean BIG MODELS. That Dragon or Trumpeter 1:35 Leopold railway gun. Italeri’s new 1:35th scale German Schenllboot. Andrea’s gigantic 1:32nd scale U-boat. Revell’s old B-1 bomber in 1:48th scale. Monogram’s classic 1:72nd scale B-36. Airfix’s 1:24th scale Harrier. Heller’s 1:100th scale sailing ships. And so on...  


 Is it the mystique of the very large that attracts us? Is it the possibility of acres of minute detail? Is it the childlike thought of having a bigger one than the next modeller? Or is it that some subjects just can’t be done justice to any smaller? The state of modern tooling suggests 1:48th scale is a good benchmark for realism, incorporating a fair detail resolution against the real thing and a general simplicity of construction, so demanding bigger is not necessarily the answer (though consider the detail found on Tamiya’s F-4s in 1:32nd scale... Bigger sometimes is just plain better).

There’s the status aspect. Bigger models are more expensive, and modellers at both an advanced skill level and approaching the rollover time of life are a major part of the target demograph that can actually afford them. (“Do we have to go on that cruise next winter, Martha? I had a hankering for Trumpeter’s 1:16th scale King Tiger...” After which the hobbyist probably slept on the couch.)  


 But what about really big: those limited-edition monsters that sometimes appear. Of course, I’m thinking about the 80cm K(E), the Dora, the biggest gun ever fired in anger. It first appeared at European toy fairs about four years ago, a 1:35th scale kit initially researched and designed by Heller IIRC, but after the demise of the company it was taken over (if I’m understanding correctly) by an independent firm, and molded in a limited edition of 1000 copies, in China. As a $1000 kit, that’s a million dollars turnover in one property, though it has been permanently discounted to US$700 for the last two years or so. At the present exchange rate, that’s nearly a grand in Australian money. It would take a seriously dedicated hobbyist to square away the funds for that (though to be fair, the cost is still significantly lower than Tamiya’s RC tanks and trucks. In England there is a hobby finance company that loans out funds against them as if you were buying basic transport to get to work.) That brings to mind Tamiya’s RC Tiger 1 and the costs involved, over $1500 Australian some years ago. I remember casting an eye on it longingly and my sister saying “you’ll look ridiculous driving to work in that on Monday.” The implication being you could buy a car for that price.  


 But does larger scale really mean more detail? It means a different feel, that’s for sure. Compare tanks in 1:72nd, 1:35th and 1:16th scales. Between the first two scales there is a wealth of difference, and it takes a surgeon’s hands to make a 72 -- they don’t call it Braille Scale for nothing -- really look the part. It can be done, there are brilliant mini-masterpieces out there, and better kits than ever before to work with. But 35 seems to be the charm, the perfect balance point at which the techniques that come naturally to hand find their best and simplest expression. Academy have those big 25th scale Panthers and Jagdpanthers, and Tamiya have just reissued their 1:25th scale Tiger and Chieftain, for the first time in something like thirty years (SF modellers will be rubbing their hands as the latter has been fetching US$60 on eBay and is needed for some studio replicas). The AM guys must have thrown prayers of thanks skyward when these kits were re-released, the accessory sets are already hitting the market… 1:16th scale is a new situation completely, in which the delicacy of touch one evolves for 35th generates effects that are almost invisible at a normal viewing distance: one must learn to weather with a broader brush, a heavier hand.

In the end, perhaps it is personal choice, as with every aspect of the hobby. The lifetime 1:72nd scale aircraft builder will fit a lot more of them into a display case than the ship modeller who builds at 1:96th, and the armour modeller who prefers Braille Scale will have far more space and funds than the 1:35th scale builder, but these are practical matters, and the aesthetic of the thing probably ultimately commands the decision. We like what we like, and that’s the end of it. There’s a certain undeniable fascination to palm-top Panzers, but part of me has a hard time taking them seriously.  


 Of course, it could be simpler... It could be that we start out affording small models and fill shelves with them, and they gradually get bigger as we get older, in proportion to the thickness of our glasses. By the time we retire our eyesight is so shot we have to build the big ones: we have no choice, we just can’t see the teensy ones anymore! Okay, extracting tongue from cheek... Normal service resumes next post!


I have the Harrier in my stash and would have photographed those huge parts but it's in a carton on the bottom and I didn't fancy excavating down to find it...

Saturday, August 22, 2009

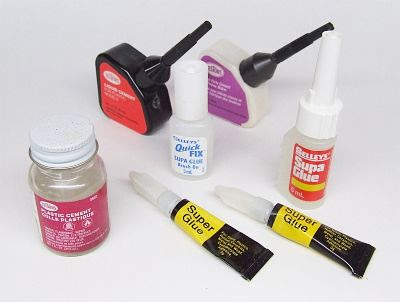
Where would we be without superglue?


When I was a kid the standard household tube glue in England was called Bostik, and if I remember correctly my earliest Airfix kits (bagged, Series 1, chosen from the front window of the newsagent at the end of the street -- ah, what a memory!) were assembled with this stuff. It was stinky, it was stringy, and it blobbed, but it was all there was! When I came to Australia with my family in 1971 the model glue of choice here was Britfix, I think there was a ‘77’ on that name but it’s too long ago to be sure. It was stinky, it was stringy, and it blobbed, in fact in every meaningful way it was Bostik in a different tube, so while it left something to be desired, it was familiar.

These were the days when parts had to be left for ages to dry, clamped and rubber-banded, even overnight, and one would cautiously remove the bands to see if things had actually set or if the model would fall apart when moved. This, despite Britfix actually being rated a ‘welding’ glue, i.e., solvent-based. Landing gear was fragile beyond words and the glues available took a mature touch to get them to cooperate--little wonder all my fighter planes as a kid were built gear-up.

I was 12 when I first encountered Testors Liquid Cement, and I thought Christmas had come. A strong cement (note, the word ‘glue’ had abruptly become old-fashioned), which applied neatly with that handy brush built into the bottle cap (praise be to the engineer who thought of something truly practical!), and which dried essentially invisible. And it had grip! The first model I tackled with it was Monogram’s 1:72 B-52, ambitious for an early teen if I say so myself. Things remained static for many years, then. ‘Superglue’ was a mysterious and dangerous substance around which the words ‘skin graft’ floated. I remember being with my dad when he bought a tube one day (mid-70s, I guess) and the retailer cautioning him about it sticking fingers together, that it was indestructible and a skin graft would be required if this dreaded accident occurred.

The truth was a closely guarded secret in marketing terms, I only heard the facts recently. I thought it was miraculous back in the 90s when I bought some PicApart, a simple water-based solvent that dissolves cyanoacrylate, but of course the chemists who invented the stuff (in the 1960s, I heard, as a battlefield surgical tool for sticking wounds together when there was no time for stitches!) had always known its strengths and weaknesses. Acetone is the principle solvent, which is why it’s a fair bet so many macho hobby guys who build powerful, filthy tanks, rusted to perfection and draped with the battle flags of fascists and communists, have a bottle of nail polish remover hidden somewhere in their workshops. Probably behind the bottle of brake fluid they use to strip old paint, but that’s another post! 

At first I resisted using superglue, it seemed too strong, liable to melt plastic or lock up parts in the wrong order. Meah... It you want severe, try Revell Contacta Professional, in the precision applicator, I’ve never seen plastic disintegrate like it before or since. (Except that fine component in a Hobbycraft kit that dissolved before my eyes under the assault of old fashioned Testors Liquid Cement, but that’s another post too...) I think I began to use superglue after reading Paul Boyer’s Basic Techniques/Advanced Results series of articles in FSM in the early 90s, and realised that a precise parts-fit coupled with superglue in the seam created a rock-solid joint which could be dressed with a knife blade and sand paper and -- wallah! -- the seam was invisible. This was the holy grail of finishing skills at the time, how to defeat the appearance of the model being a model.

I developed that skill in the decade following until it was easy as breathing. When my brother in law came down from the States many years ago he looked at my models and the first thing he said was ‘I can’t see how it went together... How did you do that?’ (I rarely preen, but that was an occasion.) The model I think was Horizon’s 1:30th scale vinyl T. rex, a model which took ingenuity and a swag of different techniques as I had never built a vinyl before … and never seen gaps like those either. Superglue to the rescue (and shims, putty and plasticine). Another kudo...

What would we do without superglue? Joints would all need putty again, unless the fit was precise enough to be closed up firm with liquid cement alone (old kits and limited-run subjects would be a lot less popular). Rubber bands and clamps would be in demand. “Allow to dry overnight” would reappear in instructions, and kitchen tables would be commandeered with stacks of books and paint bottles carefully balancing models in the dark hours while landing gear dried (shhh, tiptoe past in case it moves!), then there would be a giddy experimental moment the next day when the set was tried out and the hobbyist held his or her breath to see if that carefully finished fighter’s landing gear would collapse under it. Nostalgia, with a certain jaundiced outlook -- and maybe superglue isn’t solely responsible for remedying these ills, I’m sure a competent builder could put a quality modern kit together with the tube glue still rated safe for junior modellers, and come up with a perfectly good result. But a touch of the cya sure makes things easier!

Friday, August 14, 2009

Shopping Smart/Modelling on a Budget


Back at the time of Desert Storm there was speculation that the rocketing price of crude would drive up the base price of styrene and make the hobby more expensive, but those fears did not seem to emerge, at least not clearly from the background chatter of multiple other variables all conspiring to make it more expensive to build models. After all, everything is more expensive, that’s inflation, why should the hobby be any different? Hobbies are luxury pass-times for those with disposable income, after all. But how many of us are in a position to dispose of the kind of chunks of income the hobby field seems to have no qualms about asking these days?

There are companies that play shamelessly to the highest end of the market -- Trumpeter, for instance, by the ambitiousness of their projects and their catering to big-scale enthusiasts, not for their detail and research accuracy, and after 15 years in the game they still come second to the engineering quality and design acumen of Tamiya, Hasegawa and Revell Germany. There are less-ambitious companies working in more traditional scales, though, and their prices remain stingers: Airfix’s new Hawker Nimrod, long-awaited and eagerly-anticipated, hit the shelves in Australia at $99.99. That’s a big no-can-do, pard, for a lot of builders. That’s possibly why the new fancy releases are sitting there on the shelf at my LHS, and the bulk of the stock has barely changed in three years. Also possibly a big reason the shop changed hands and is now concentrating on R/C and railroading instead.

Plastic kits are too expensive. If they were half the price I’d buy a lot more. If they were half the price the shop would sell a lot more, which would be better than selling hardly any, but here we see the distributor-mechanism. Kits have an infinite shelf-life. They’re not date-sensitive, they have no use-by, they don’t get sent back and pulped... They sometimes gain value with age. If the distributor owns the stock, it never will go out on special. Mark-downs are virtually unknown here. The price is the price and if the customer can’t afford it, the stock gathers dust until the shop closes -- but the kits go back to the distributor. Last year a local toystore chain gave up carrying kits for the same reasons, and held a distributors’ sale at the warehouse. I looked in but the mark-downs were simply not enough to tempt me to buy, but I noticed a retiree leaving with a Tamiya 1:350th scale Enterprise he’d paid about $200 for. Ah, rollover…

So where do I find the kits to keep my stash ever-expanding? Simple. eBay. I joined eBay about five years ago and in that time 95% of all my kit purchases have been through that medium. In the header pic (some ready-use items, not the actual stash) of the 69 items on those shelves, 57 came via eBay. The other 12 are through Squadron Mailorder in Carolton, Texas, who had my order every month in the years before eBay was born. I cleared a huge collection of Superscale decals in the days they regularly cycled through the range at 99c. But the days of specials like that are always numbered, and eBay gives you the chance to wander amongst the wares of the world, almost like an ancient marketplace. You can find retailers in places like Hong Kong, Beijing and Seoul that offer the big brands at serious savings (though lately they are almost all hiking their profits by cheating the purchaser on the postage -- there’s no diplomatic way to say it, it’s cheating pure and simple, and to be fair there are plenty in the West who do the same).

The best bargains are most often at auction: resellers who buy up old collections and kick off the bidding at just a couple of dollars. It takes a modicum of skill to play the auction game, but you can learn it easily enough, and you need to be aware of only two things. 1) If the kit is on general release then you’re trying to beat the price at which you could buy it locally: be aware of that price and know what you’re willing to spend, all-up, for the item in the condition offered. If the bidding runs beyond that point, don’t be pig-headed, just let it go. If it’s an old classic then be guided by your instincts, only you know what you’re willing to pay for a collectable. 2) Postage -- it’s no use getting a great bargain on the item and finding out the postage takes all the cream away from the deal. You might as well have bought it locally, paid the extra and taken it home with you rather than waiting weeks (months even) and hoping at doesn’t go missing.

The US really messed things up when they did away with surface mail a few years back, it must have hurt US trade at many levels. It took the greatest bargain and made it ho-hum, what else can you call it when the postage to mail a kit to Australia is double what you won it for? And it’s a cynical act of big government in any case, to support an airline system failing due to fuel price increases. Well, when airmail is the only option, we learn to optimise that too. You do that by having a friend in the country of origin who will accept eBay purchases for you, then will combine them in the most compact shipping carton possible (remember, it’s not just by weight that they charge, it’s by linear dimensions too). A friend -- who will charge you actual shipping costs, not mark up the postage by many dollars to shore up his or her own fortunes as a seller. That way you lose on the domestic postage to get the item to reception point, and save on the international shipping of several items in one unit.

You have to ‘box clever’ as my late Dad used to say. The hobby, though better-served and bigger than ever before, has suffered from the global recession, runaway inflation and national debt, and more than ever it’s a rich man’s pass-time. I could spend thousands setting up the workshop of my dreams, but until that many dollars are both earned and not required for other things, I’ll make do with the one I have, which is not bad: it has most of the tools I want, most of the paints, and is supported by a healthy stash of subject matter assembled by careful collecting. We may not ‘haggle’ in today’s Western marketplace, but you can still find a way to get what you want without paying top whack.


Monday, August 10, 2009

Final Review: 1:48 Hasegawa Bf 109 K-4


 With the K-4 finally done (okay, maybe there are one or two details I missed – I blush, I forgot the wingtip formation lights, so she’ll be coming out of the display case for a quick spot of red and green…) I can finish my work in progress articles with a roundup of this kit’s qualities. Hasegawa’s kit #09063 (JT63) is quite the gem. It has many unused parts from other variants, different cockpit sidewalls, the droptanks and underwing gunpods of G-series bomber-destroyers, three different tail wheel struts, three different instrument panels. You need to keep a careful eye on the instructions to make sure you select the right parts for the variant you’re building.  


 Marking options are supplied for two aircraft, Yellow 4, “Ingeborg,” of II/JG 3, March 1945, and a second contemporary airframe. Markings include a full suite of stencil data, even including the Werk numbers which may or may not have been carried on the tail of Yellow 4, depending on the sources you consult. I was originally a little put out with the engineering of the cockpit, but from that point onward the model literally fell together. The propeller attachment could have been smarter, trying to accurately align the fuselage halves while trapping an un-glued rotation piece in a channel at the front end was quite impossible for my dexterity and I settled for gluing it in place as a fixed stub, thus creating a non-turning finished prop. Parts alignment was superb for the most part, my only criticism is a tiny fore-and-aft mismatch on fuselage right and left detailing, which is only really visible where the aft fuselage segments are delineated on the underside. The flaps were marred by a long sink mark on the upper surfaces, which was only visible in certain lighting, virtually guaranteeing the parts were mounted before the problem was noticed. Similarly, the leading edge slats can be mounted open or closed, and while the deployed configuration adds visual interest the separate parts come with the usual penalty for assembling them closed: they don’t fit as well into their bays as the slats of the real plane would.  


 But these are minor quibbles, really. The surface detailing is accurate for a K-4, the hatches and access panels are in the right places, the Erla Haube looks convincing, and with a few extra details scratched together (the radiator pitch rods, battery bay hatch and flap ribs which I covered in my first post on this kit) it builds into a visually convincing model. I could have added hydraulic lines from fine wire but I was out of time and application on the project, that’s something for future builds. Another detail which I had meant to use was Quickboost’s exhausts, beautifully cast with open throats and midline weld seams, however they did not provide the locator slot for the glare shields of the late-series 109s, molded as separate kit parts, and I didn’t fancy scratching this detail at so late a stage. The resin AMs ended up in the drawer against a future build.  


 The decals went down actually quite nicely, reacting well with Microscale chemistry, though the spiralschnauze tried to curl up on the paper and was broken into pieces to be applied, and the big open crosses silvered somewhat. The 60 or so decals make a visually ‘busy’ aircraft, even if the real “Ingeborg” may not have carried a full suite of stencils (references and reconstructions do not, as you would expect, always agree.) Promodeller panel wash and MiG pigments created the worn appearance, the carbon stains and dust that denote a service aircraft being hard-flown, and EZ Line provided the radio antenna. Without going to the extent of AM cockpit and wheels, opening the canopy etc, this model makes a sweet display piece that really captures, the gutsy, brutish yet still graceful lines of the ever-more powerful ultimate Messerschmitt 109. I would recommend this kit to anyone with a few builds under his or her belt: while the multi-tone camouflage will be a challenge and the many decals will certainly occupy more than a couple of evenings, the basic soundness of the kit engineering will foster an attractive finished product if approached with care, forethought, and above all, patience. 


Saturday, August 8, 2009

Product Review: Berkshire Junction's EZ Line


 Model railroading firm Berkshire Junction came up with a winner when they developed EZ Line. It was meant for adding in-scale power and communication lines, even wire fences, to railroad layouts, but this product has many uses.

As the product blurb explains, it is an elastic polymer with 700% stretch, and given that the spool comes with 100 feet of line, that’s a lot of finished product! It comes in five stock colours, white, charcoal, green, rust and rope, but the thread takes acrylic paint perfectly so if you can’t get the colour you need for a particular job it’s no disaster. When I ordered I could only get rust, so I use Tamiya XF-1, diluted with thinner, to create black antenna cables on aircraft.

The thread is very thin! When stretched it seems hair-thin, and that’s almost scary. Obviously, the tighter you draw it, the thinner it becomes, and that’s something to keep in mind. The extreme elasticity means there is very little ‘pull’ to it, which places it within the grabbing strength of superglue, and even my first fumbling attempt was pretty successful.

I rigged the antenna wire on my 1:48th scale Hasegawa Bf 109 K-4 (see the final roundup on that project, coming next post), and found the line worked very well, though you need patience and dexterity, and a decent pair of tweezers. I located the forward end into a tiny hole drilled in the fuselage top, simply fixing it with a drop of CA in the hole, and when it was dry I threaded it through the loop antenna and drew it (mildly) tight across the stub mast on the tailplane, dabbed it with CA and held it in place for a couple of minutes until I dared release it. It held no bother, and I trimmed the loose end with small scissors. The cross-cable was done the same way, seated into a fine drilling in the fuselage and, when dry, drawn very mildly up against a spot of glue placed on the first cable, and held. When dry I trimmed the end, and it was done. The cross-cable inevitably deflects the main cable down, which is not technically accurate: I’ll need to play with this product a bit more to figure out how to use it best.


Apparently it is very popular with biplane enthusiasts for rigging, and that’s a job I look forward to with some trepidation, though also interest, as I’m sure a well-rigged biplane will look great on the shelf! Shipbuilders have been encountering great success using this product for elements of rigging. Another project that comes to mind is a PBY Catalina, using EZ Line for those enormously long radio antennas between the tailplane and the wingtips.

The elastic thinning of the line also means it is equally appropriate for 1:72nd scale, simply draw the thread a little tighter to get greater scale thinness.

All in all, though comparatively expensive, this is a very versatile product, and the name tells all, it really is easy to use. I don’t think my tools draw will ever be without EZ Line from now on. See EZ Line and many other products at: http://www.berkshirejunction.com I ordered mine in Australia online through Red Roo: http://www.redroomodels.com/ where the price is currently Aus$26 per spool, plus shipping.