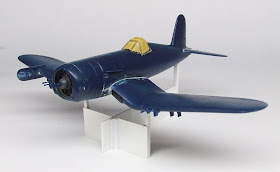
Many years ago, about 2002 I think, I published a small article in FineScale Modeler about how to make your own painting stands. They have those fancy ones you can buy, with clamps and a rotating base, they adapt to any model, and sure, they’re great, but they cost mucho dollars. I proposed a simple solution, a purpose-made painting jig that will support a model while you’re spraying it. With aircraft, the idea is you paint the underside, then turn it over with the stand locating into the wheel wells, and go hands-off to paint the top.
Car modellers have long used the old standby of a bent coat hanger to support a car body while it’s being sprayed, the single most critical phase in car models. The finish on the paint is everything and getting that coat on just right means treating the job like the real thing. Armour is less demanding in this sense, as flat paints are much more forgiving: no matter how complex the scheme, the paints will be touch-dry in no time and you can adjust and move on.
Aircraft of multiple colours offer the chance to spray one shade, let it dry, then support the model by those areas while painting the next, but what about models which are largely or completely mono-tone? The axiom of “keeping a wet edge” to the spray coat becomes difficult to say the least, and that’s where a stand really comes in.
We probably all have ideas and solutions to this problem, and no particular approach is any righter (or wronger) than another. I have found that a handy way to do it is to glue together a few bits of styrene rod, strip and sheet to make a stand that supports the plane on three points, and it really couldn’t be easier.
The stand I made for the article all those years ago was designed for a 1:72 Corsair, and, working on the kit that has appeared in my last two posts, I had a need for it. Unfortunately I couldn’t find it, so had to make up another. Rather than duplicate the original design, I used the even simpler design for the 1:72 Phantom painting stand that I made in 2003 for another FSM feature project, and which I do still have to hand.
Two pieces of sheet plastic are tenon-jointed together to make a cruciform shape with the short axis equal to the track of the main gear wells, and the long arm reaching to the tail gear well. They are braced together with some 3.2mm angle stock, then three uprights are installed, the main well supports from 2mm square stock, braced with small angle, and the tail support made from strip stock laid onto each side of the sheet and another piece between them to create a solid column above the sheet. I cut the pieces in ten minutes and assembled them with liquid cement in less.

The great thing is, you can adapt this formula for any aircraft type in any scale, and if you know you’ll be building many of a particular type they can solve the hassle of how to hold a monocoloured bird while the paint is going on. For US Navy types between 1944 and 1958, with that iconic overall Dark Sea Blue scheme, it really simplifies things.
Oh, and yes, if you remember that article in FSM, it was the very same Corsair model appearing in it as I am just now coming to grips with!
No comments:
Post a Comment